DIY Cedar Planter Side Table Combo
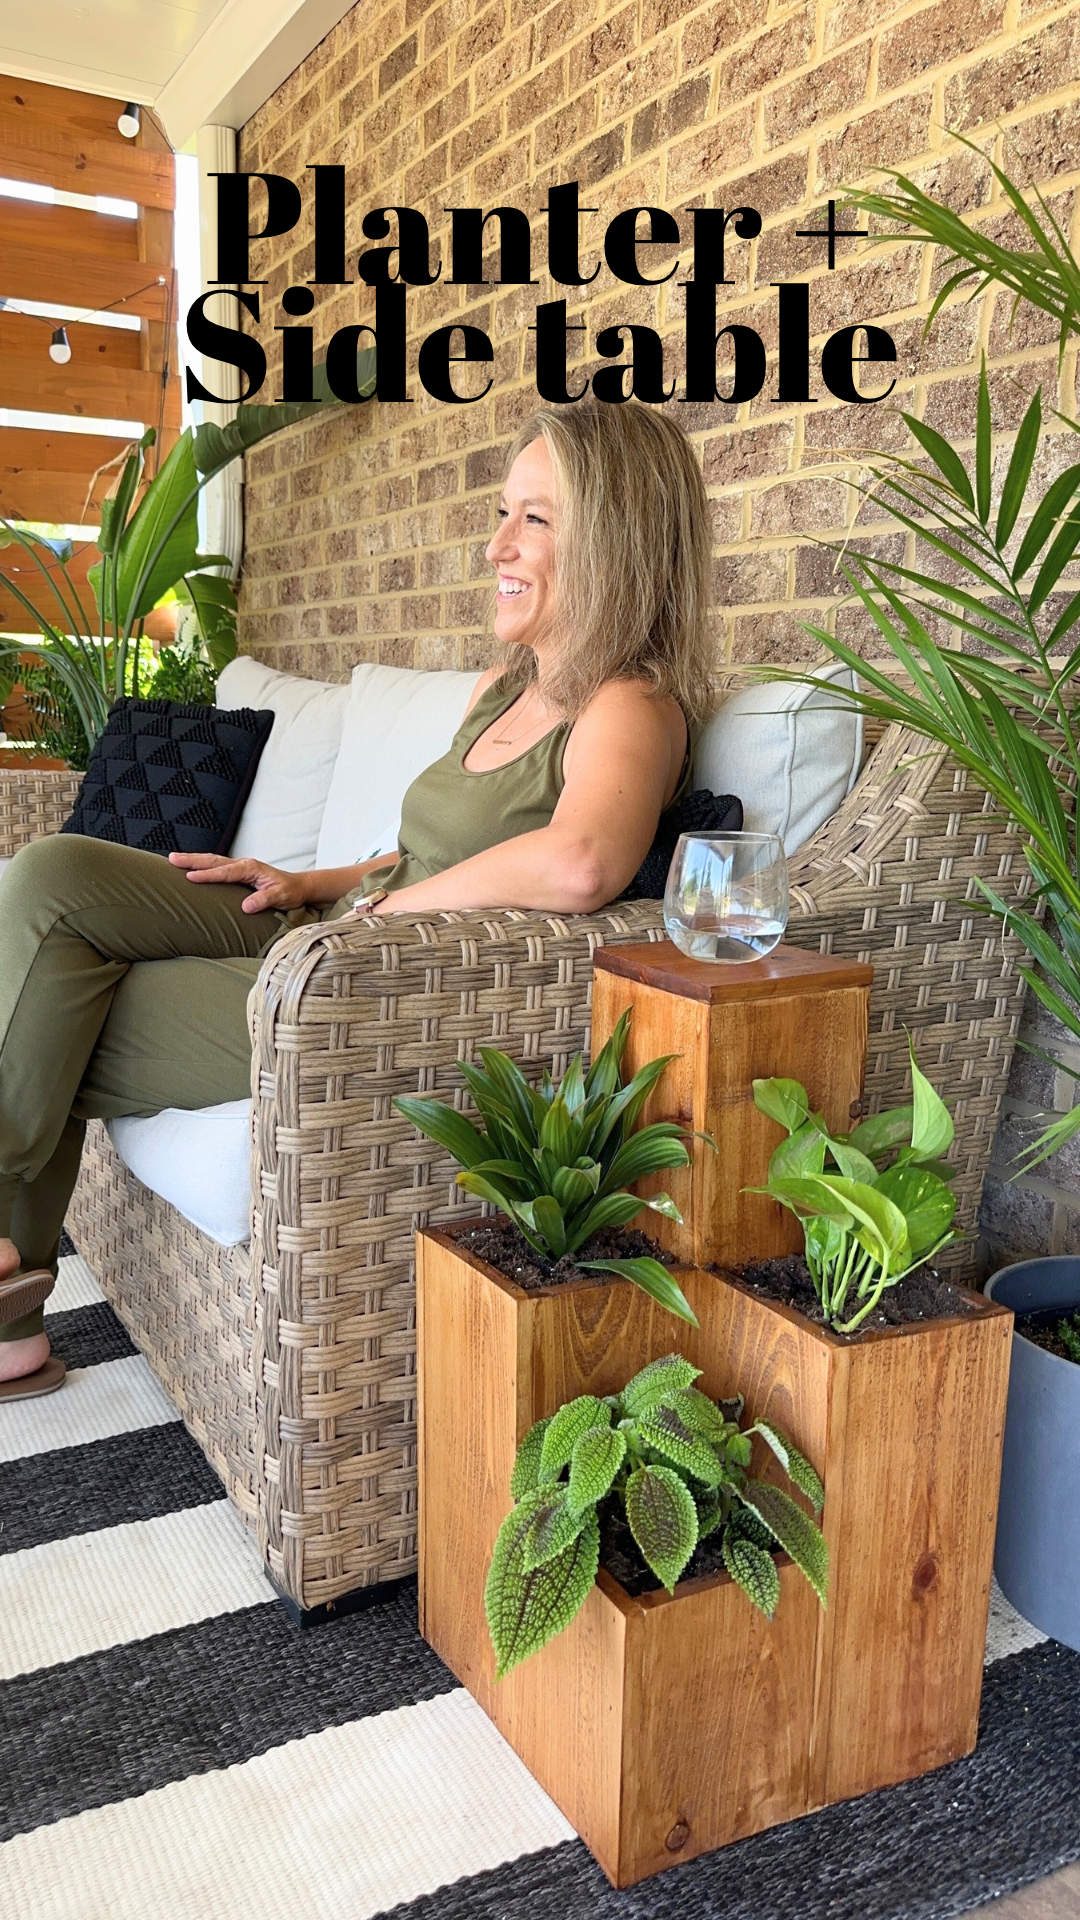
I recently built this cedar planter side table combo for our patio, and I’m obsessed with how it turned out. I loved the idea of combining greenery with a functional side table!
Materials Used:
Cedar boards (1inch x 6inch x 8 feet) x 2 OR cedar picket fences
Clamp
Polyurethane Finish - Exterior
Paint brush
Drill + drill bit
Plant plastic liner (I use the plastic fabric that is laid down in flower beds before planting)
Plants, potting soil
The cedar fence pickets worked great for this project because they’re inexpensive, lightweight, and naturally more resistant to moisture outdoors. Most cedar fence pickets are approximately 5.5” wide which is exactly what I used for this project.
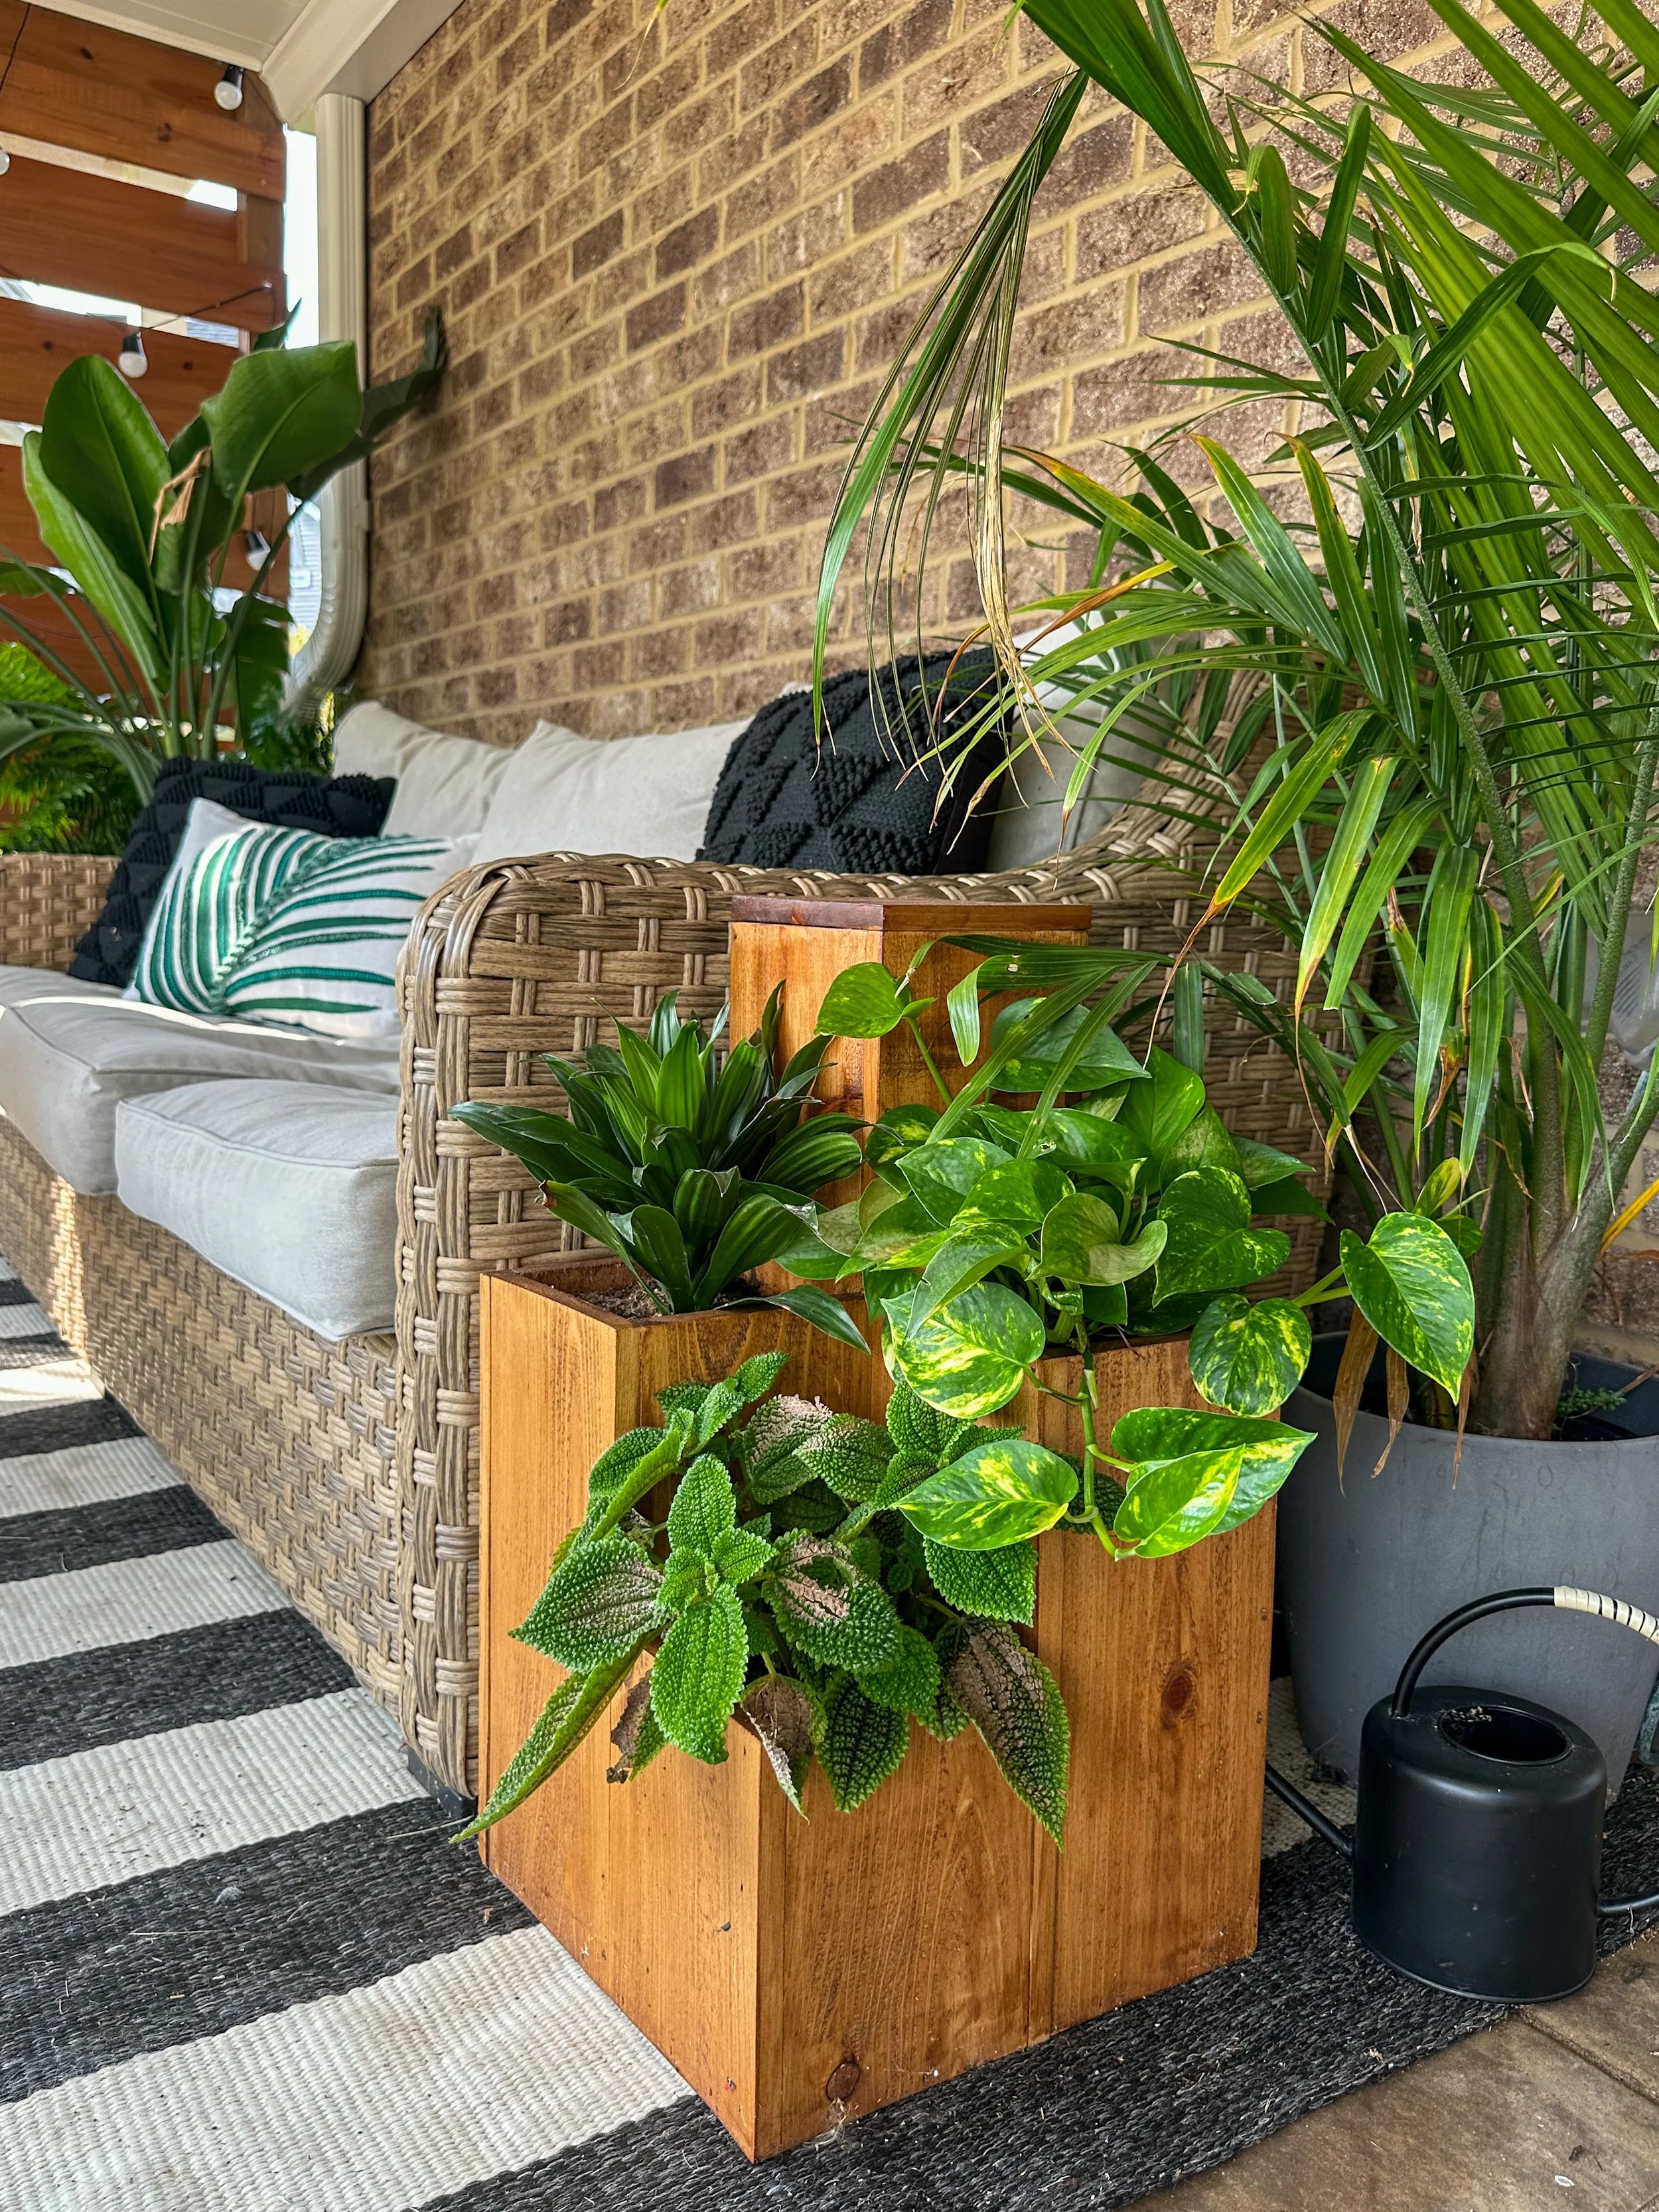
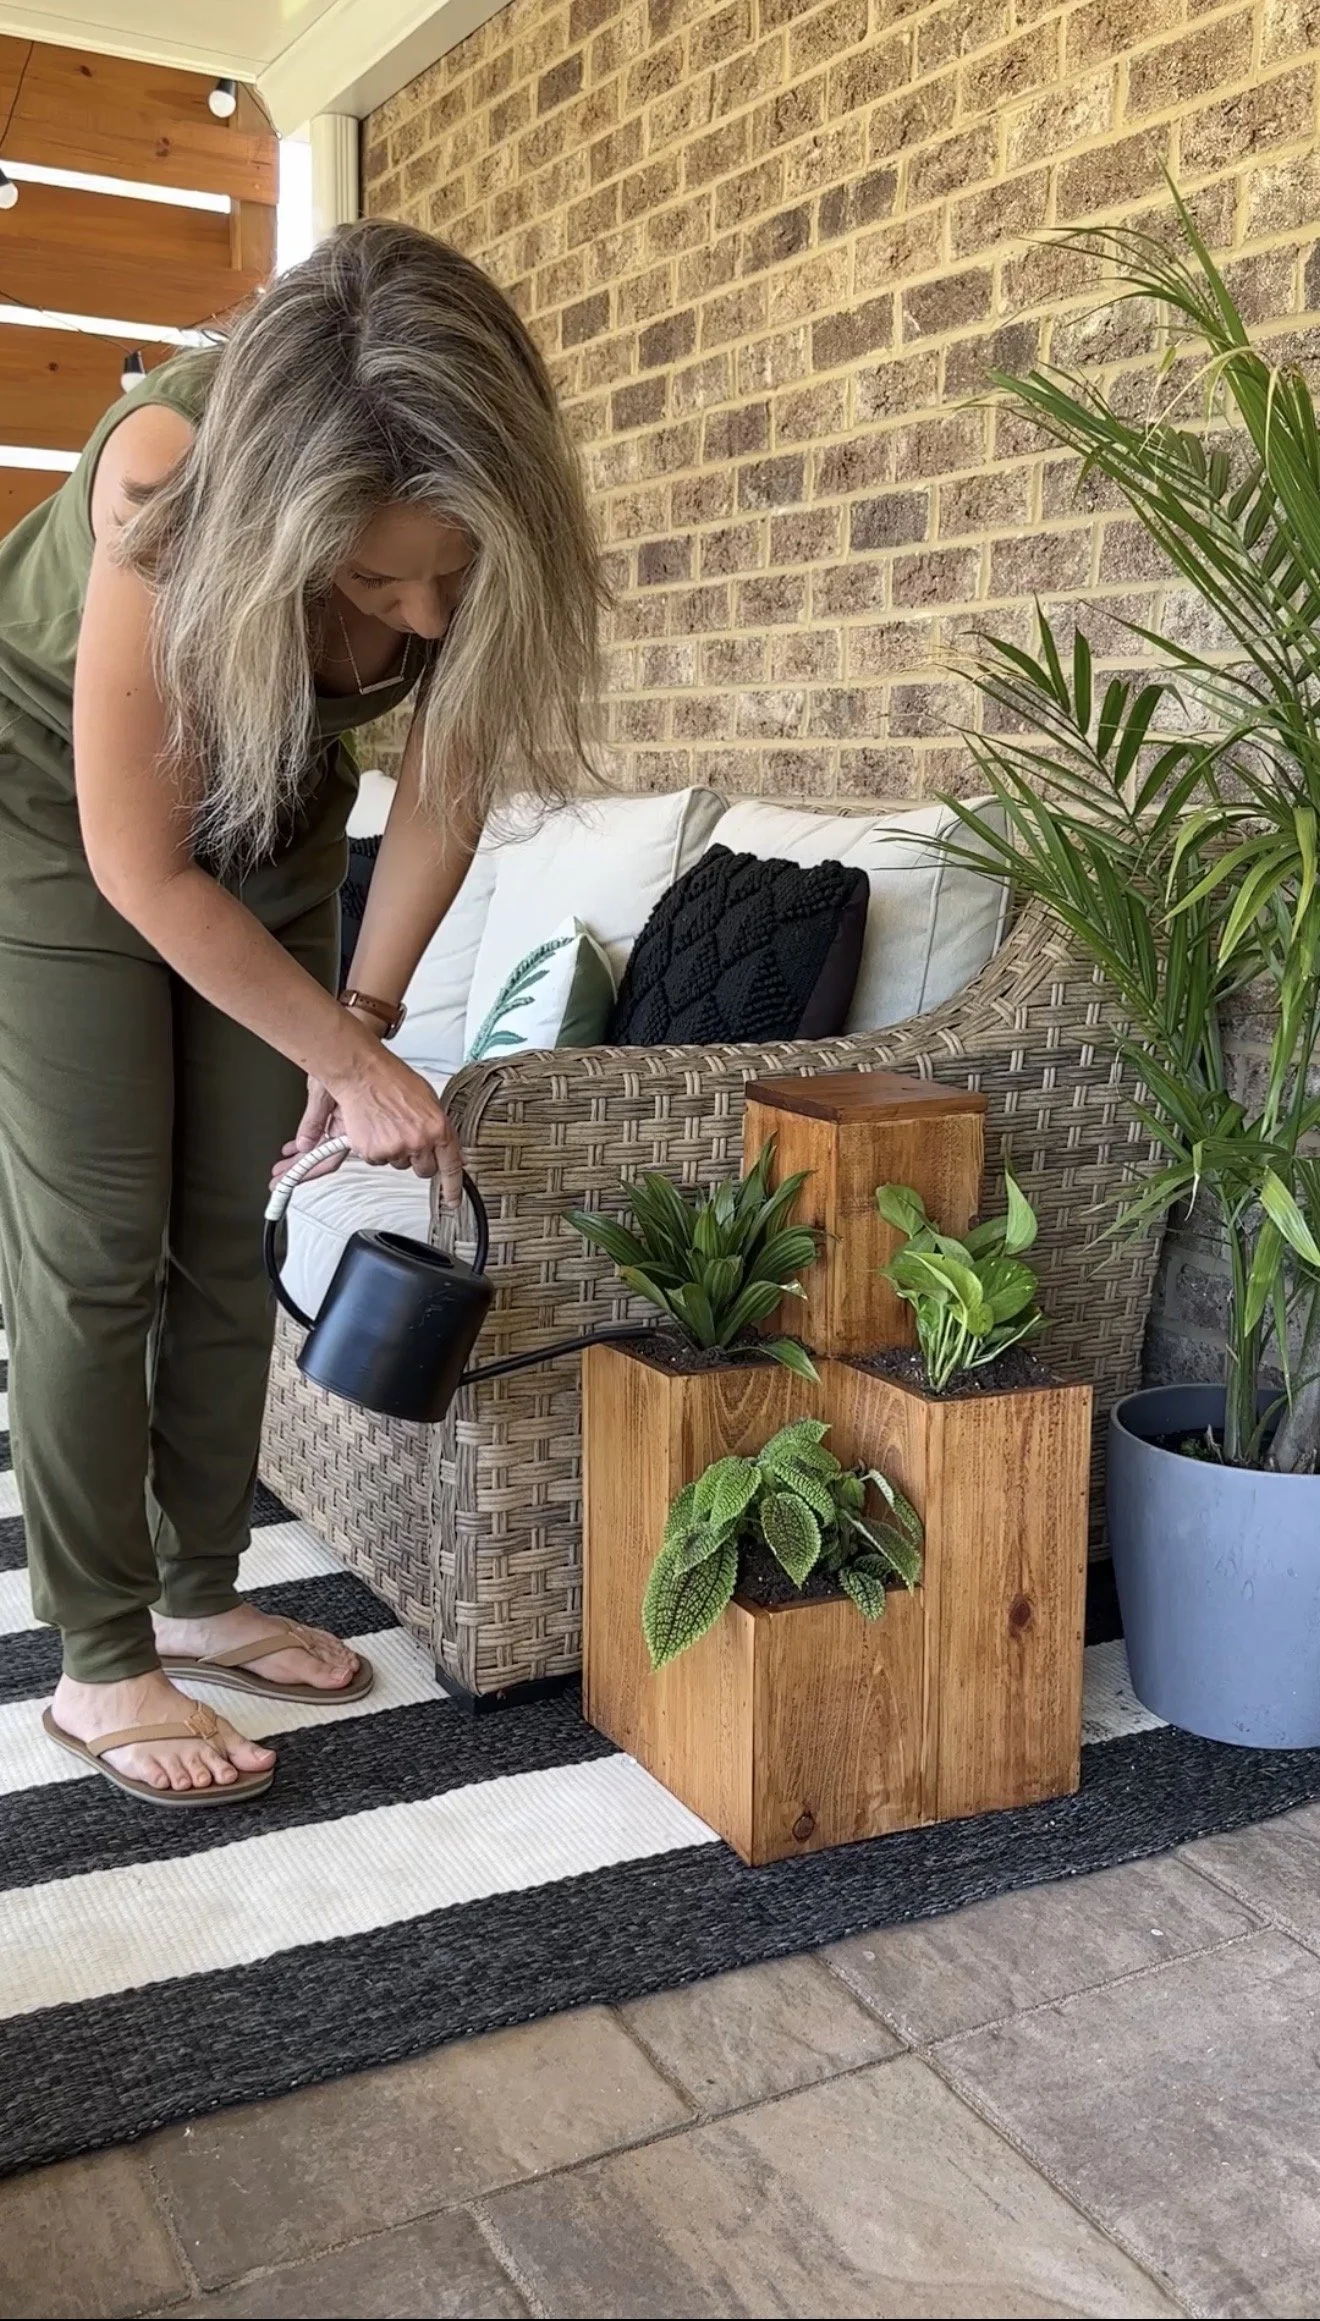
Tower Dimensions
This build includes four total tower sections.
Tall Center Side Table Tower
Approx. 22 inches tall
Approx. 5½ inches wide
Includes an added top platform piece
This is the tallest section and acts as the actual side table surface for drinks or decor.
Two Matching Side Planter Towers
Approx. 14 inches tall
Approx. 5½ inches wide
These flank each side of the taller center tower.
Front Accent Planter Tower
Approx. 8 inches tall
Approx. 5½ inches wide
This smaller front planter creates layered height and gives the whole piece a more custom look.
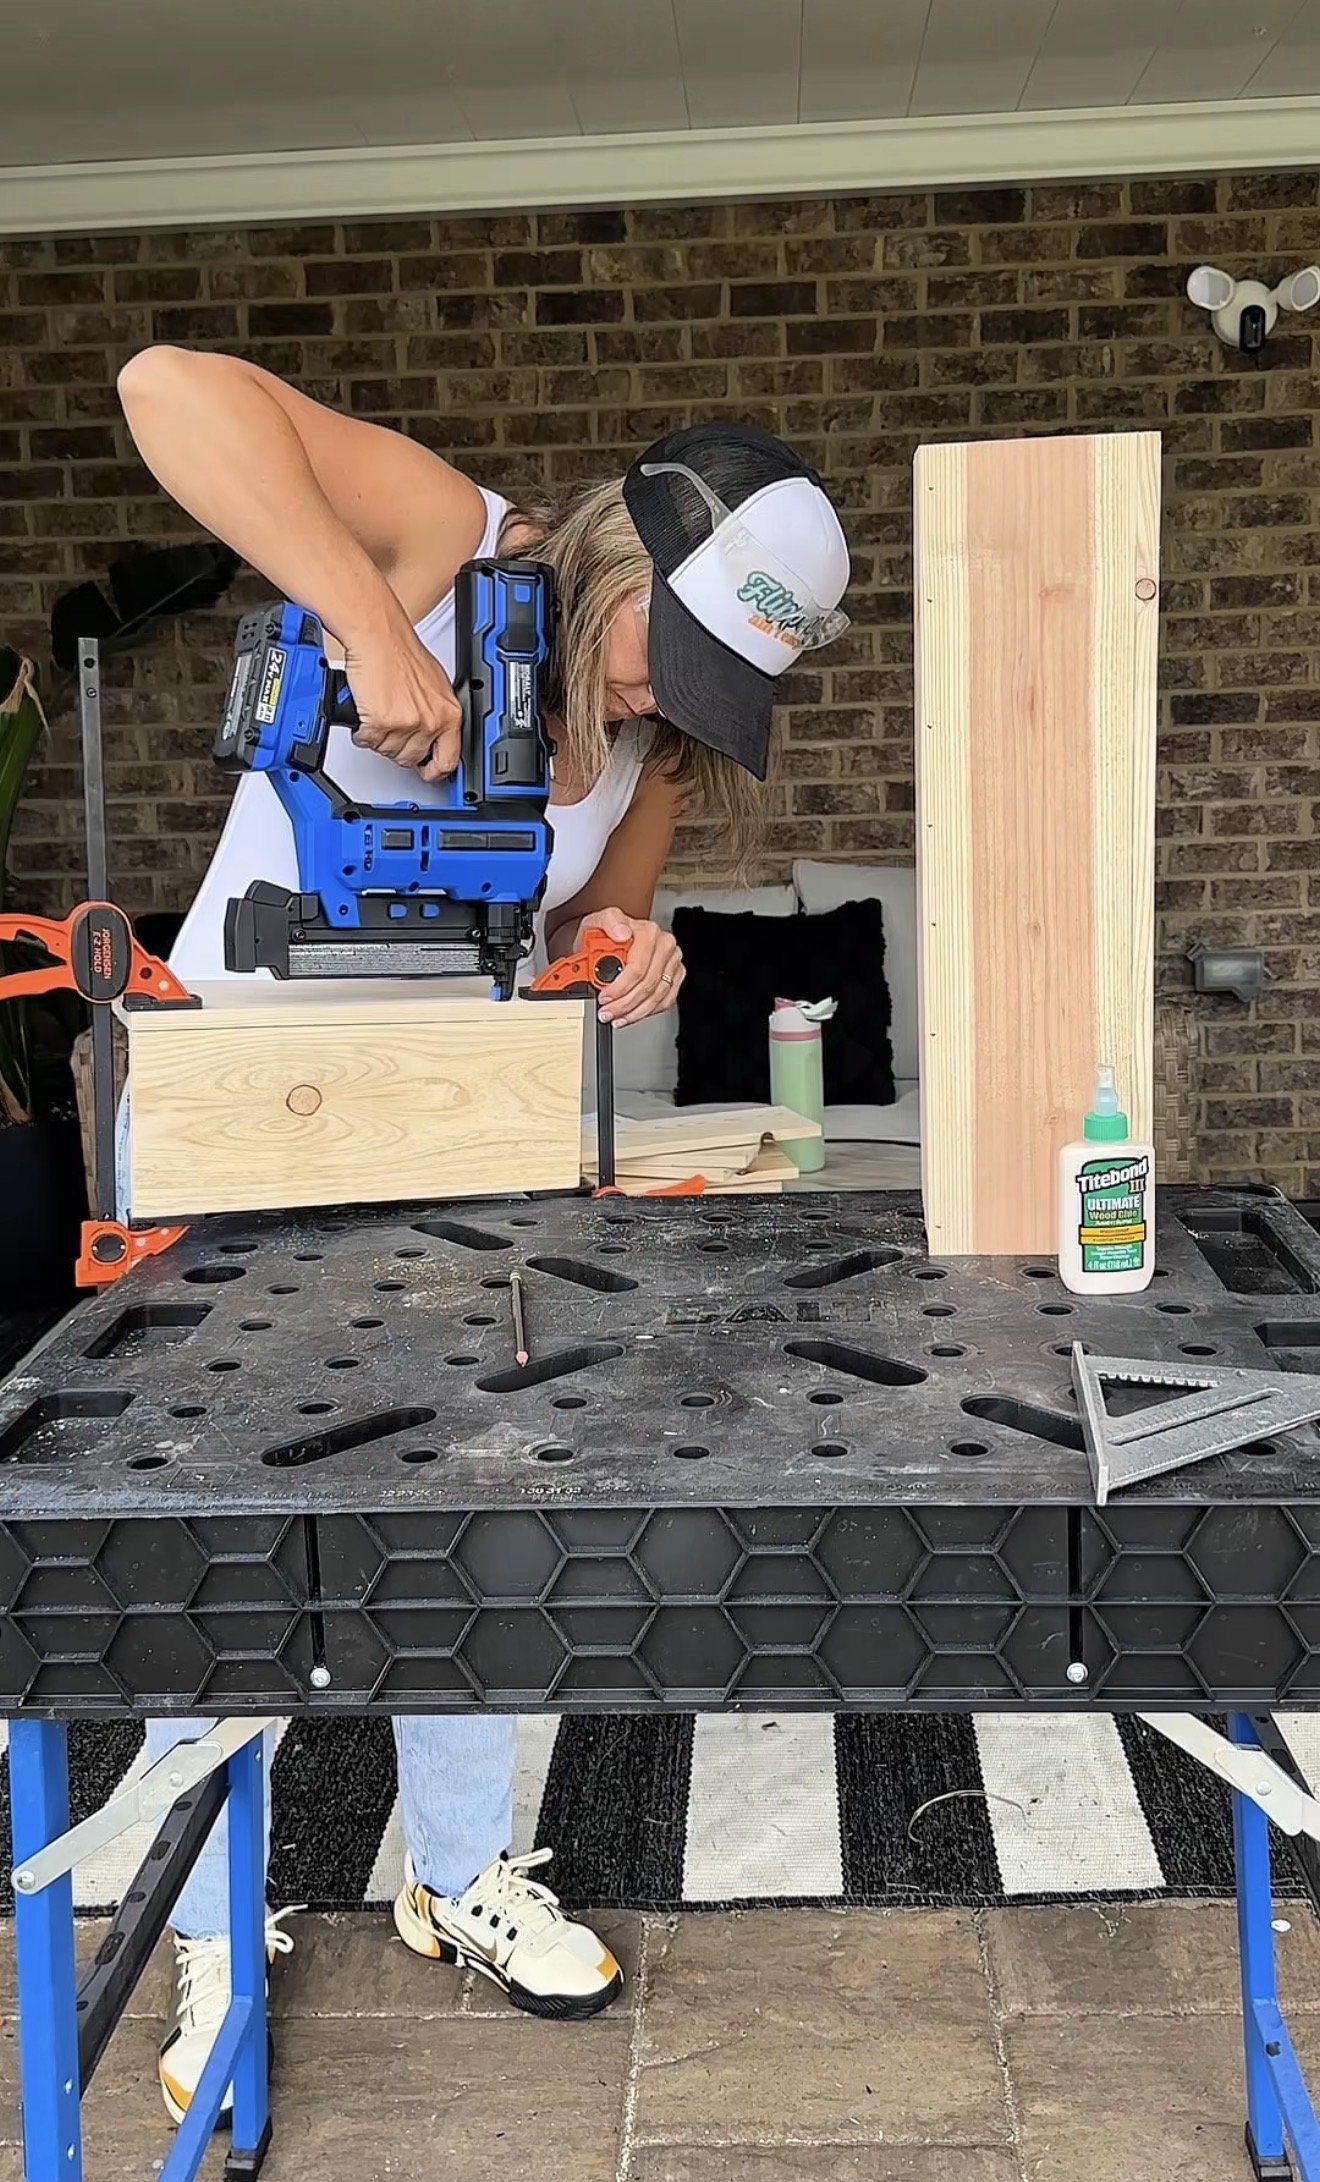
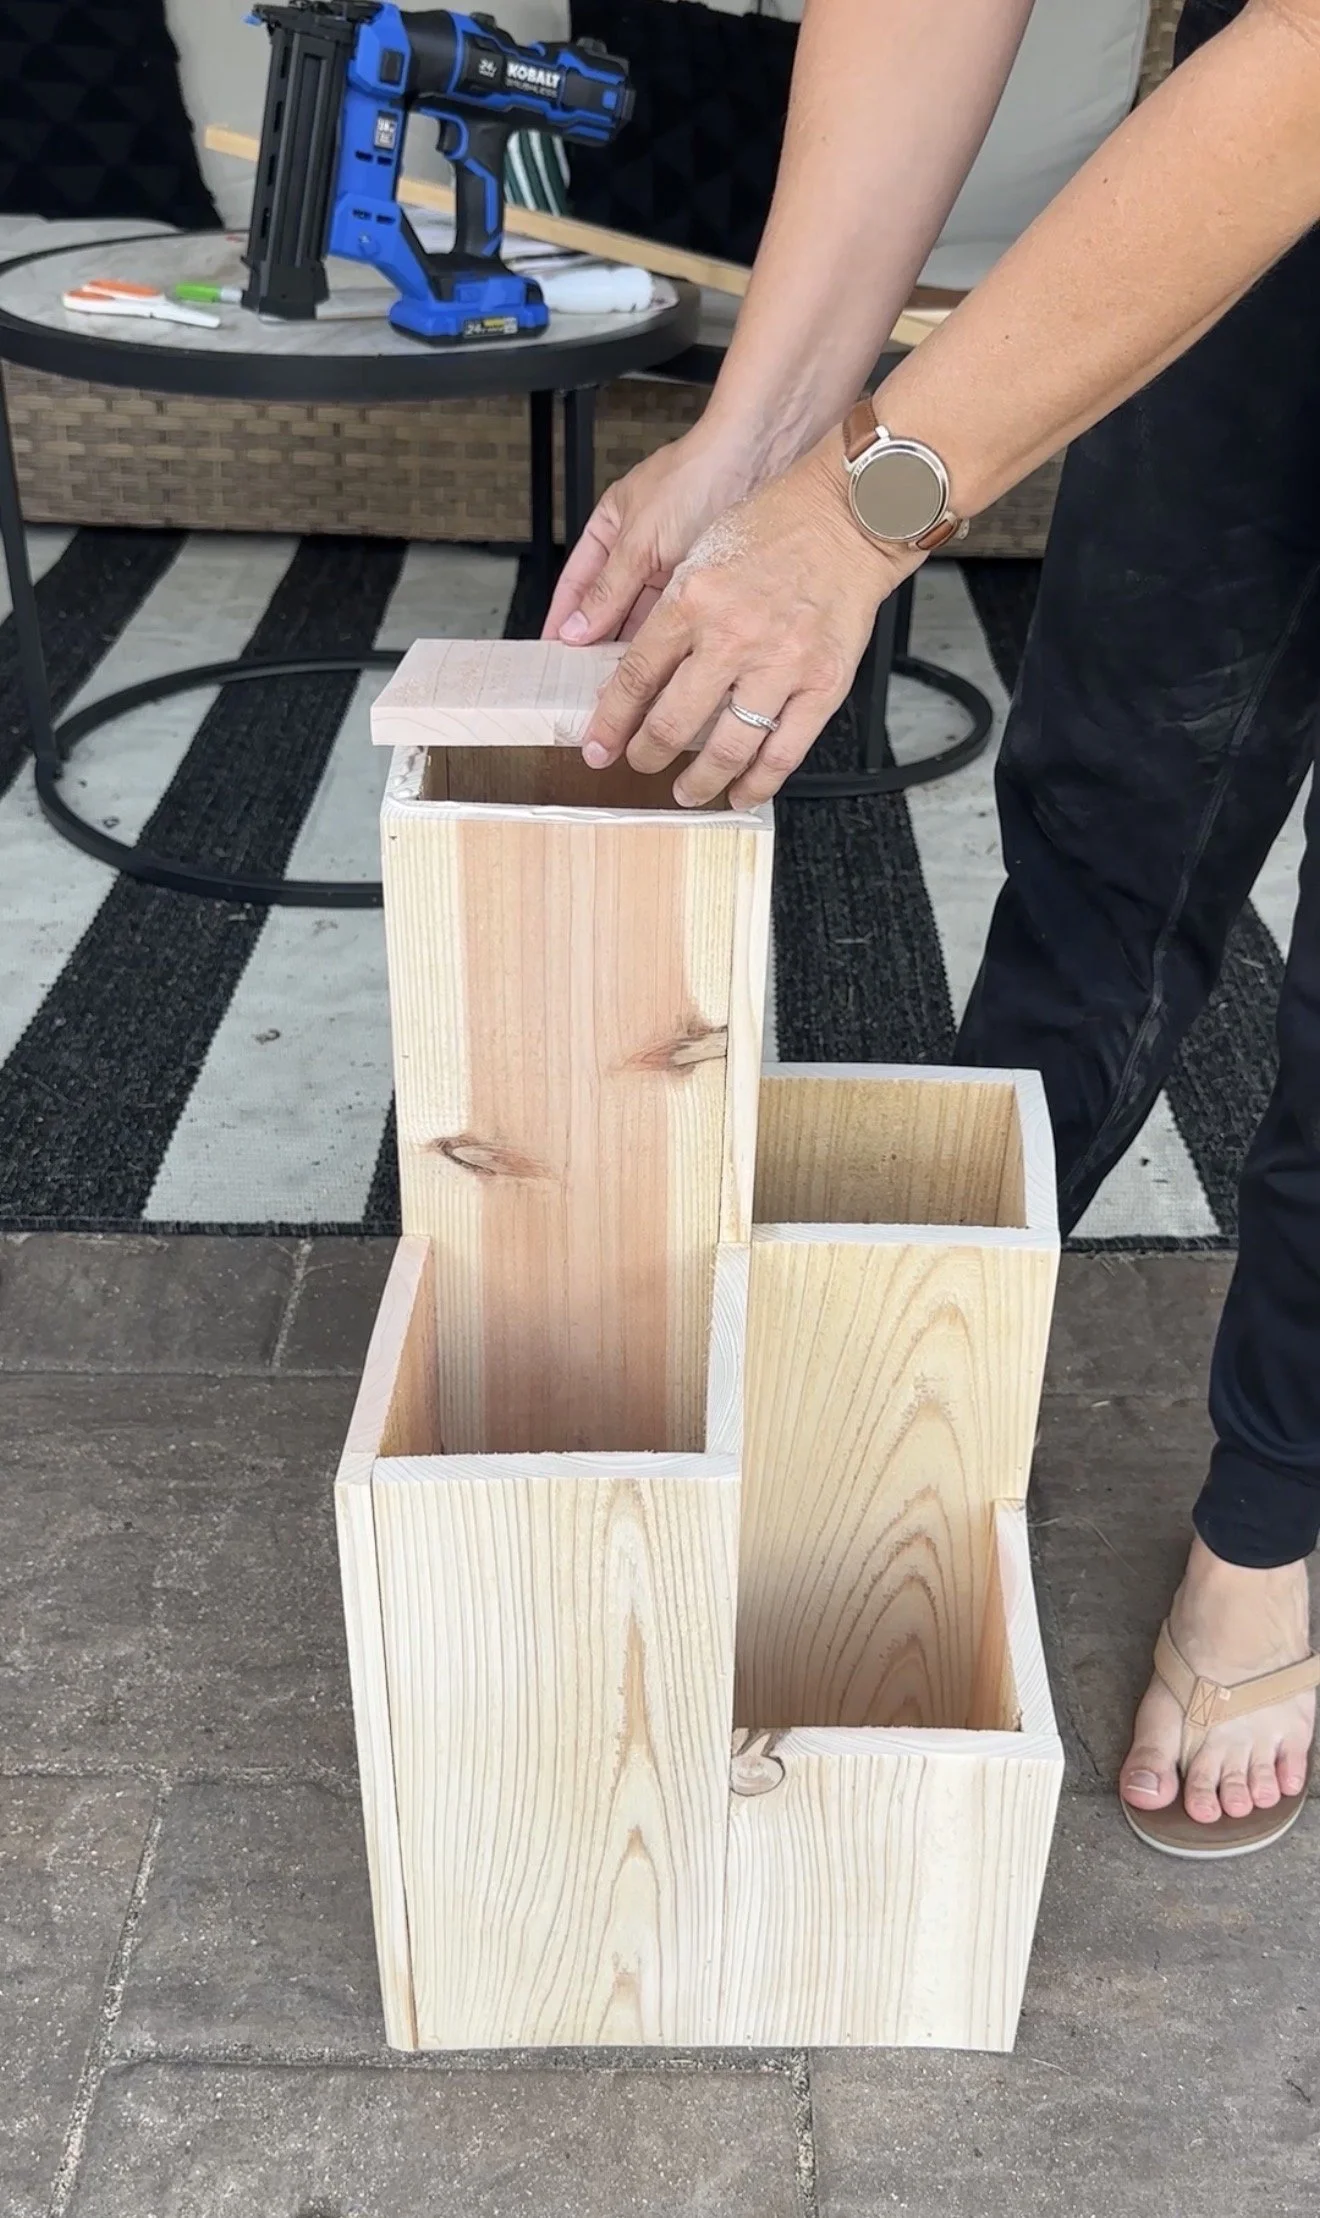
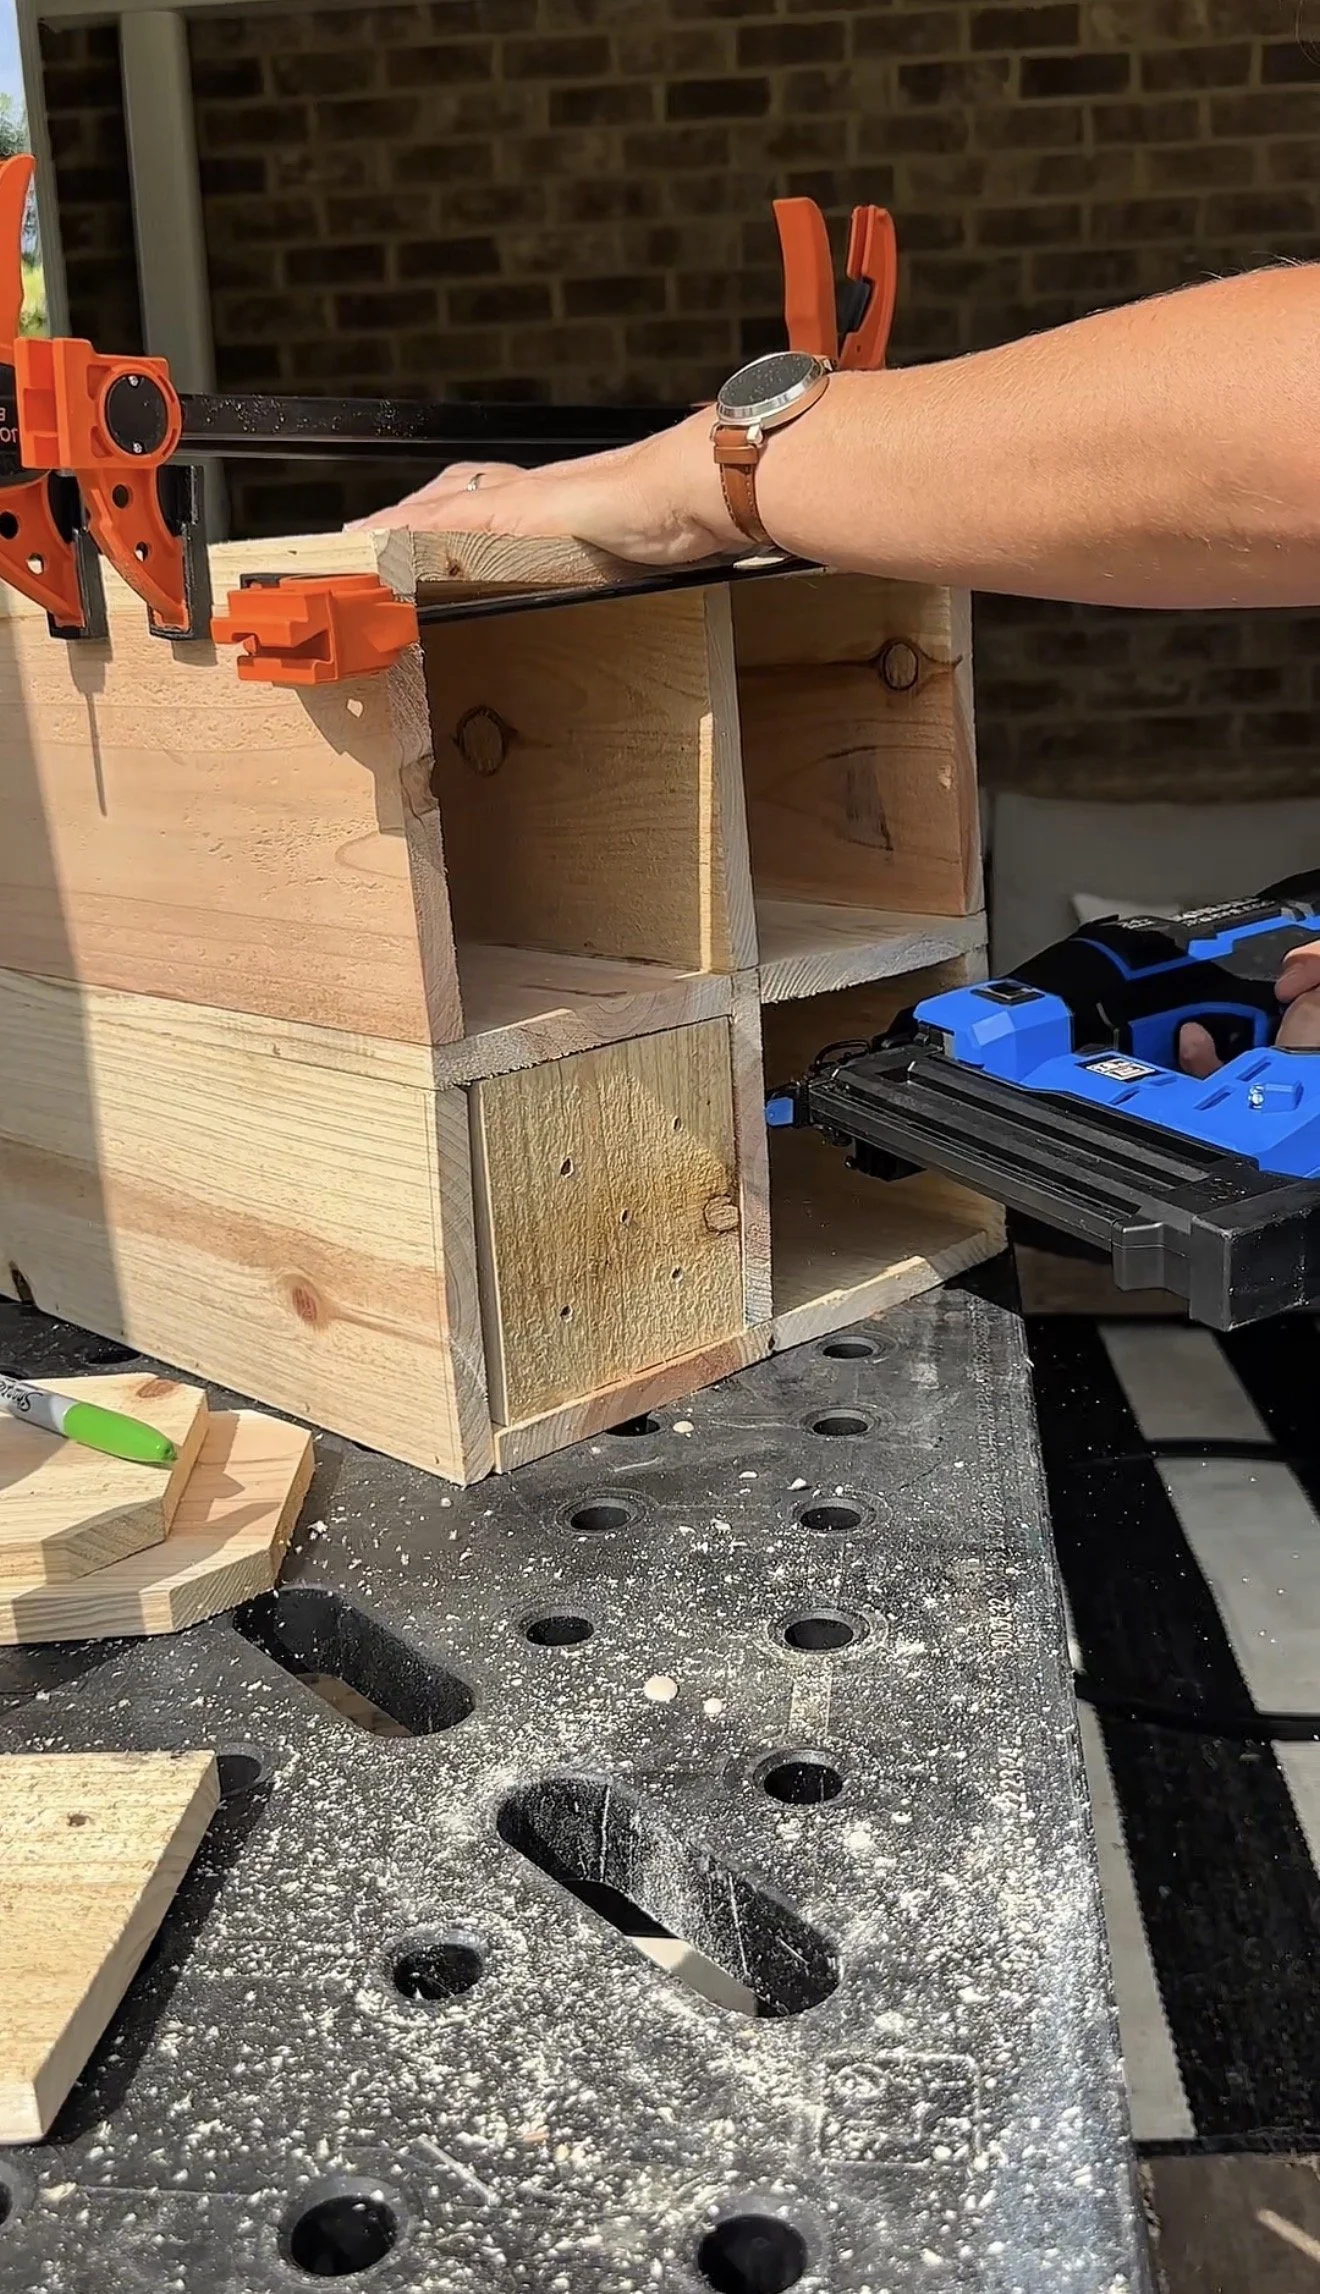
Step 1: Build the tower frames
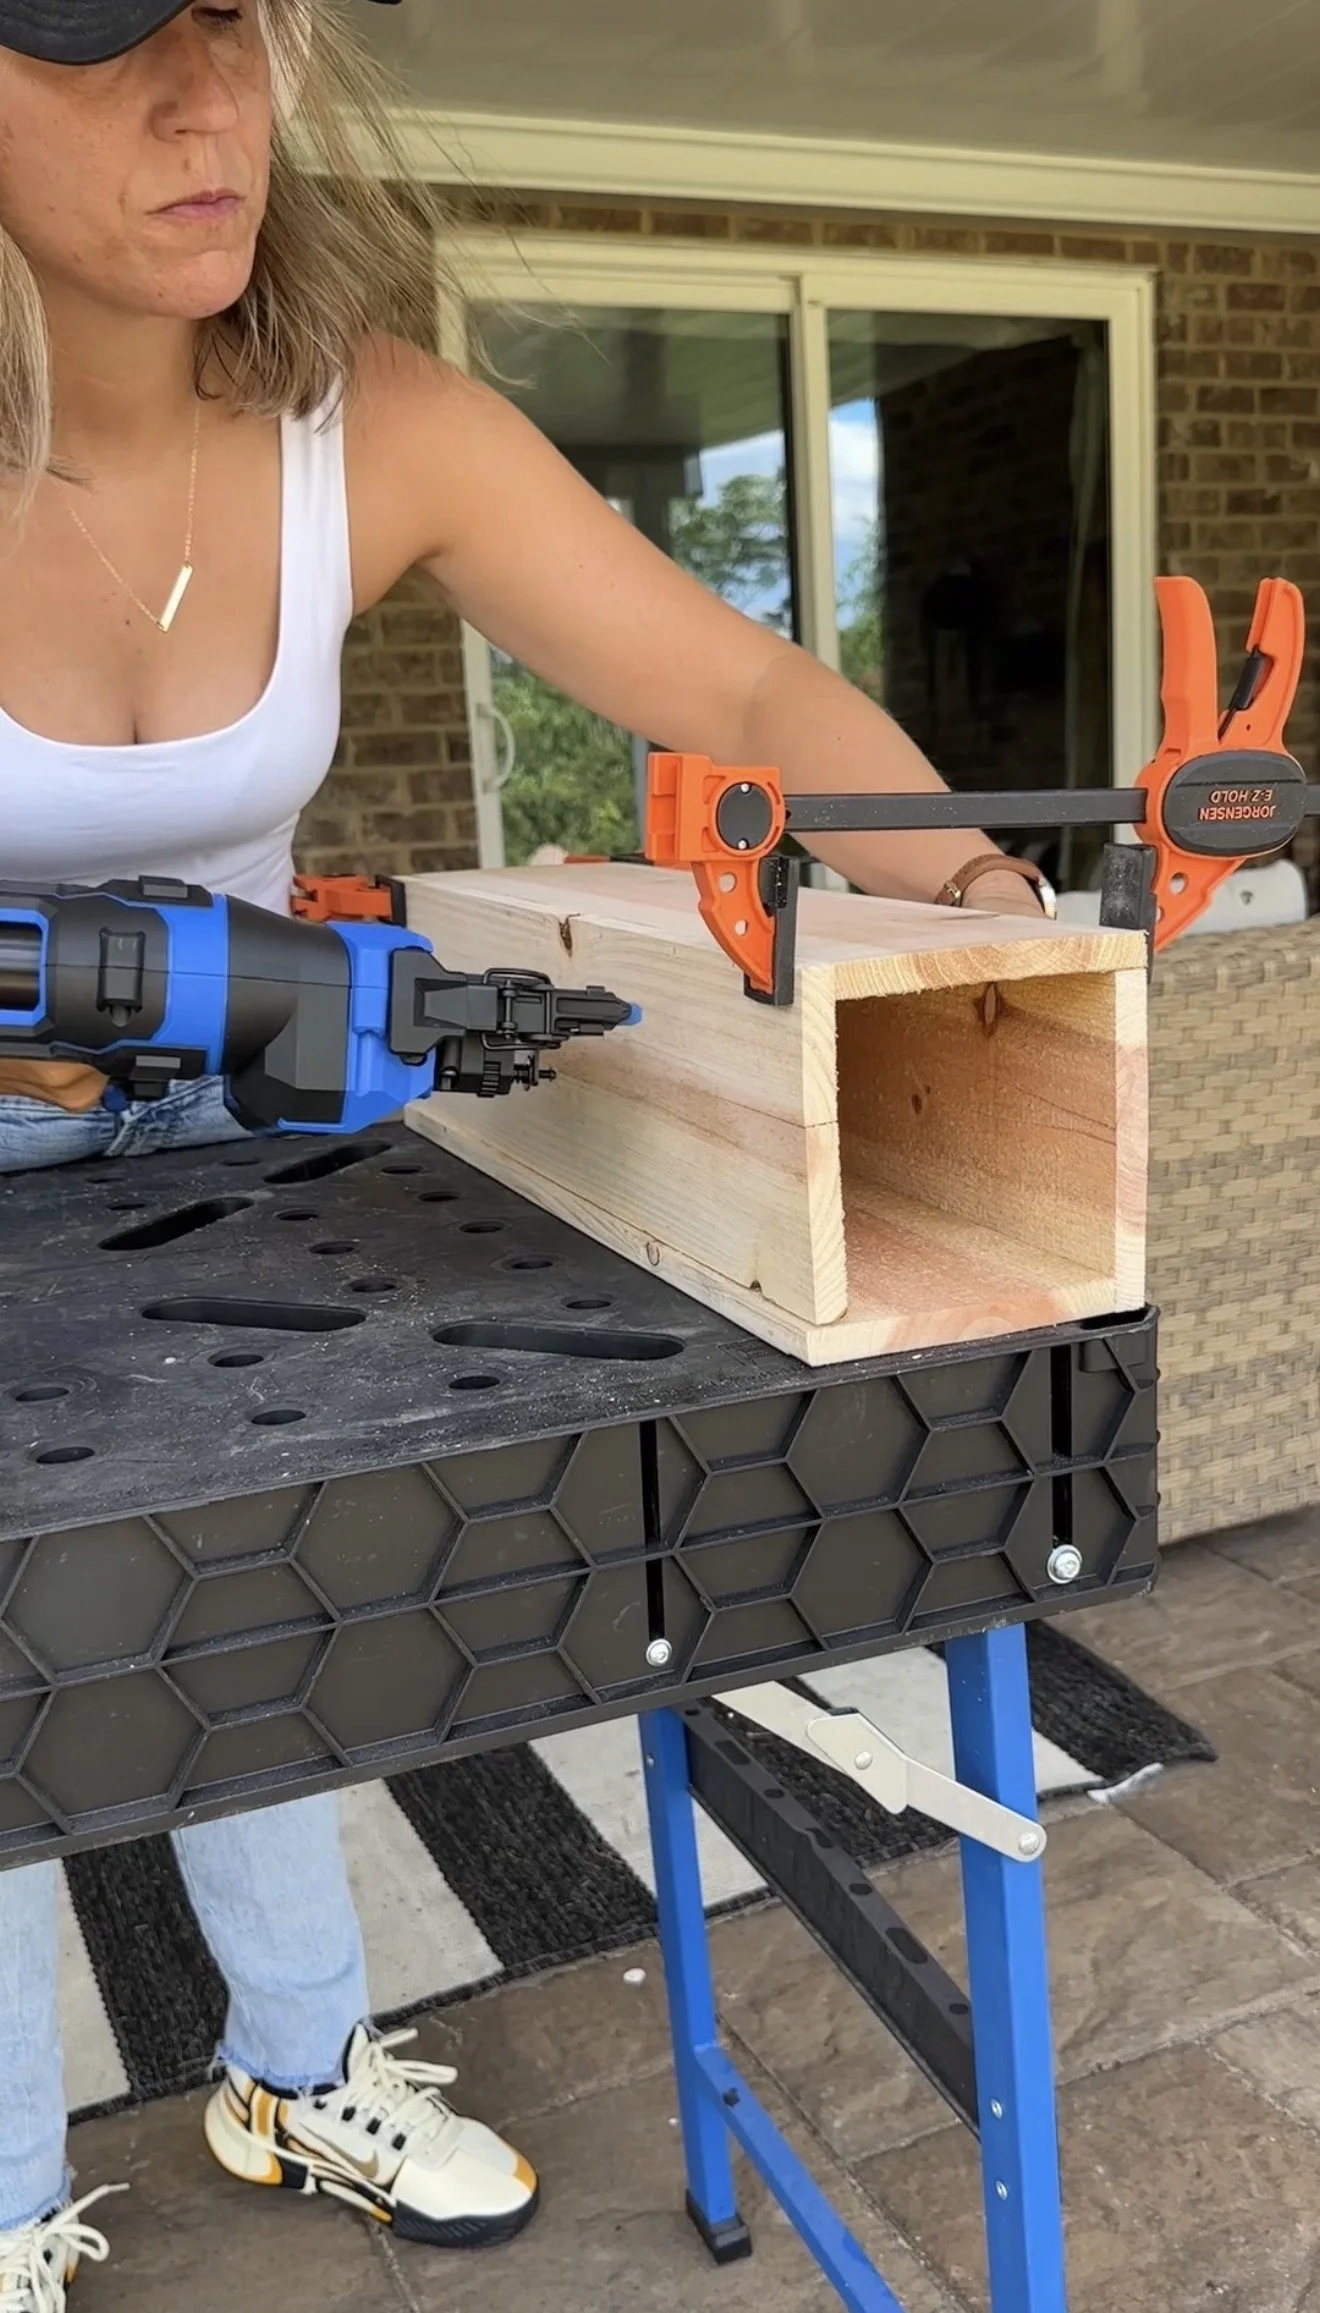
I started by building each tower separately.
You’ll need:
1 tall center tower
2 matching medium towers
1 smaller front tower
I assembled each section as a simple rectangular box frame using cedar boards and exterior-rated fasteners.
The original inspiration build used a similar “L-shape” assembly process to create the box structures, which makes the build beginner friendly and keeps the cuts simple.
Step 2: Attach the cedar boards
Once the frames were assembled, I attached the cedar boards around each tower to create the finished exterior.
For the planter sections:
leave the tops open
For the center tower:
install a solid top piece to create the table surface
I made the center tabletop slightly larger on top so it functioned more like an actual outdoor side table.
Step 3: Add planter bottoms with drainage holes
One thing I did differently from the inspiration build was adding planter bottoms with drainage.
For each planter:
cut a bottom insert piece
drill several drainage holes throughout
install the insert inside each planter
This helps prevent water from pooling at the bottom and should help the wood last much longer outdoors.
The inspiration project also used planter inserts positioned several inches below the top opening to hold soil.
Step 4: Line the inside of the planters
To further protect the cedar from moisture, I lined the inside of each planter using plastic plant liner.
staple or secure liner to interior walls
leave the drainage holes exposed
This creates a barrier between the wet soil and the wood.
Step 5: Sand the entire build
Before staining:
fill nail holes if needed
sand all surfaces smooth
wipe away dust
Step 6: Stain the cedar
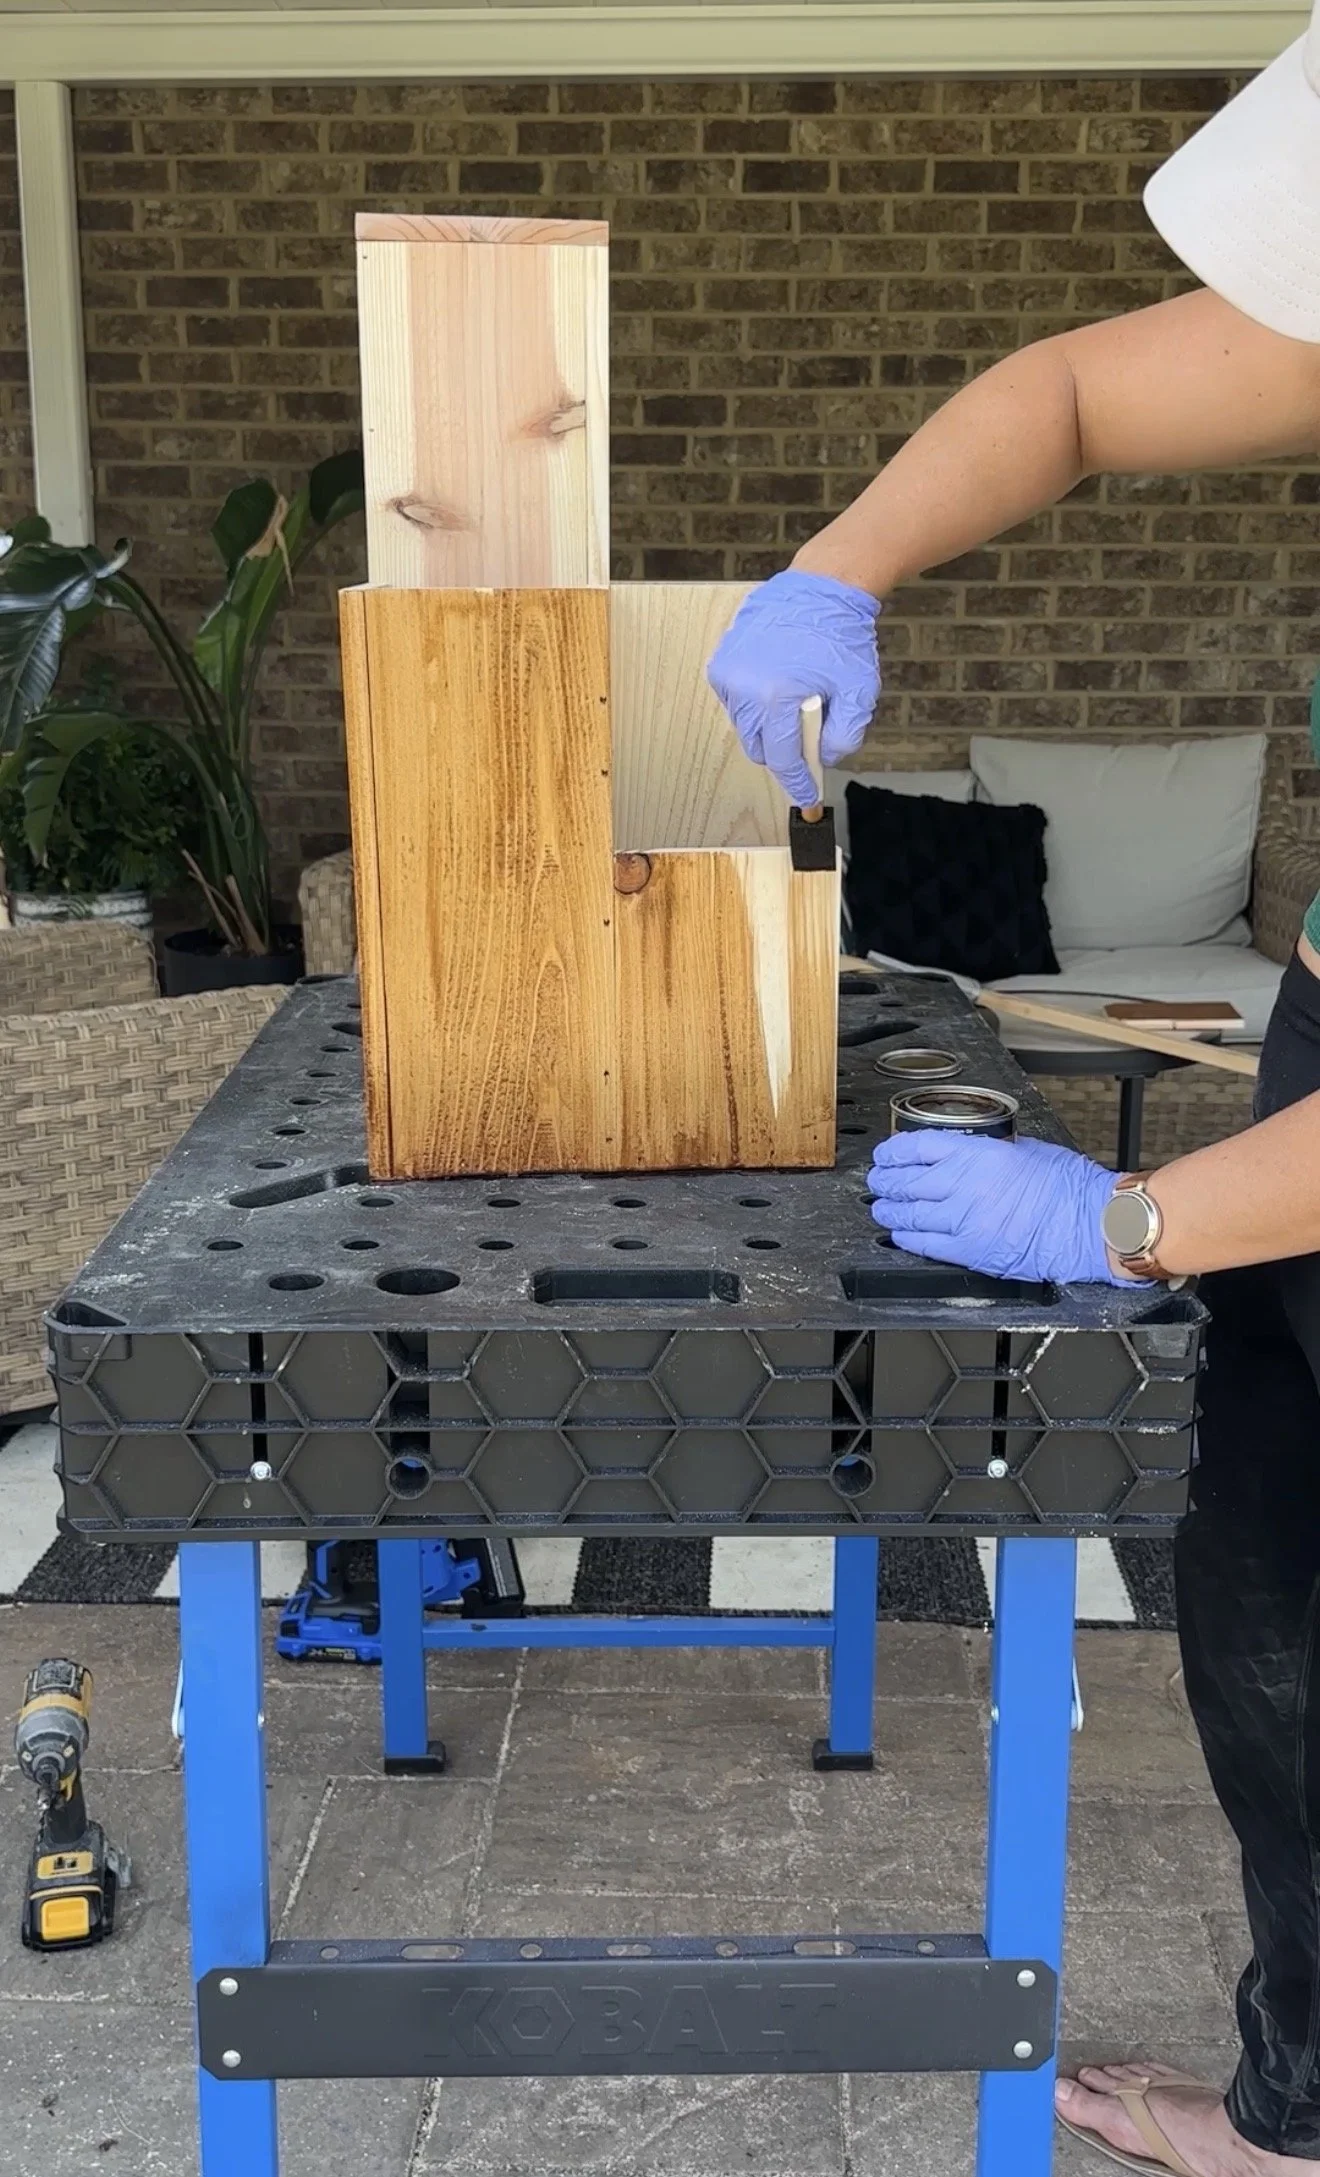
I stained the entire piece using:
I loved the warmth of this color, and it already includes a built-in sealer which makes it great for outdoor projects.
Step 7: Seal for outdoor durability
After the stain dried, I added extra protection using:
This gives the wood another protective layer against outdoor weather and moisture.
The inspiration build also finished the project with stain and polyurethane for protection.
Step 8: Add plants and style
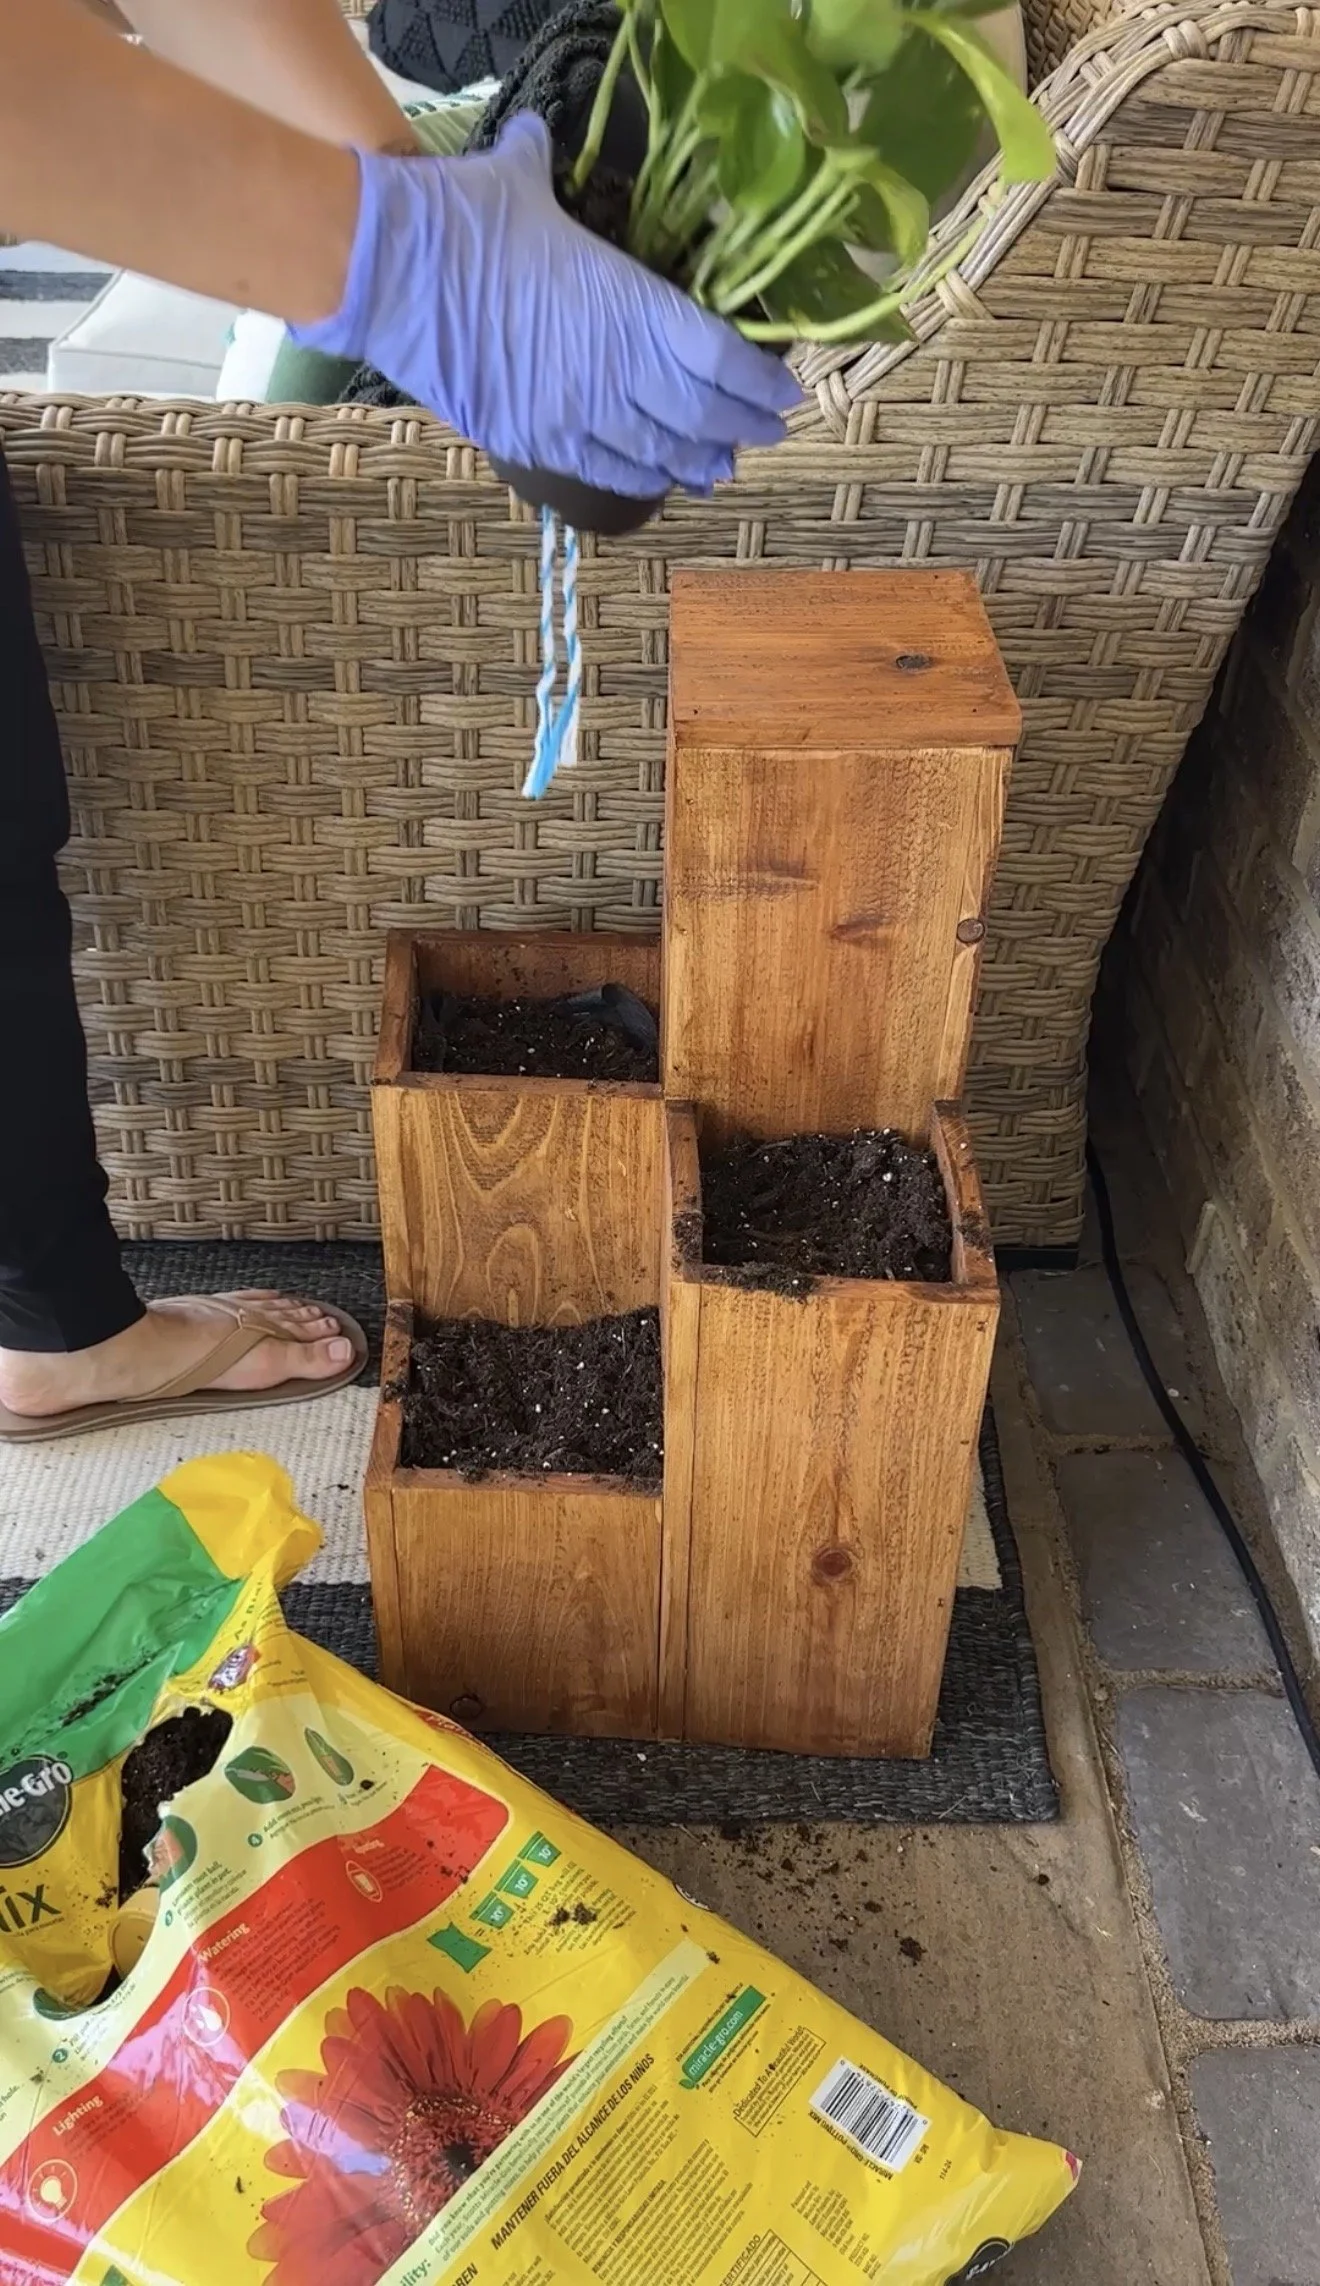
Once everything dried:
fill the planter sections with soil
add flowers, herbs, or greenery
style the center table with drinks, candles, or outdoor decor
The layered heights make the whole build feel modern and custom while still being a relatively simple DIY project.
Final Thoughts
This ended up being one of my favorite outdoor builds because it combines planters and functionality into one piece. Using cedar fence pickets kept the cost lower, while the drainage inserts, liners, stain, and sealers should help everything hold up much better outdoors over time.