DIY Round Storage Coffee Table
If you’ve ever tried to grab something from inside a storage coffee table, you know the struggle. You have to remove everything from the top, lift the lid off completely, find a place to set it down… and then you can finally grab what you need.
I wanted something better for our living room. Something beautiful, functional, and with hidden storage that was actually easy to access.
So I built this round fluted coffee table with hidden storage and lift-top hardware, and it ended up looking like a designer piece you’d find at a high-end furniture store.
The best part? It’s completely DIY-friendly.
Why I Built This Coffee Table
Our living room needed a larger round table, and I loved the look of modern fluted furniture. But most of the ones I found were either:
Extremely expensive
Didn’t have storage
Or had storage that was awkward to use
So I decided to build my own using pole wrap to create the fluted look and add hidden storage inside.
Materials
Some of the links in this post are affiliate links. If you make a purchase through these links, I may earn a commission at no extra cost to you.
Pole wrap (for the fluted look)
Spray stain – Dark Walnut by Varathane
Pocket hole screws
Precut 36" wood round (for the lid)
Tools
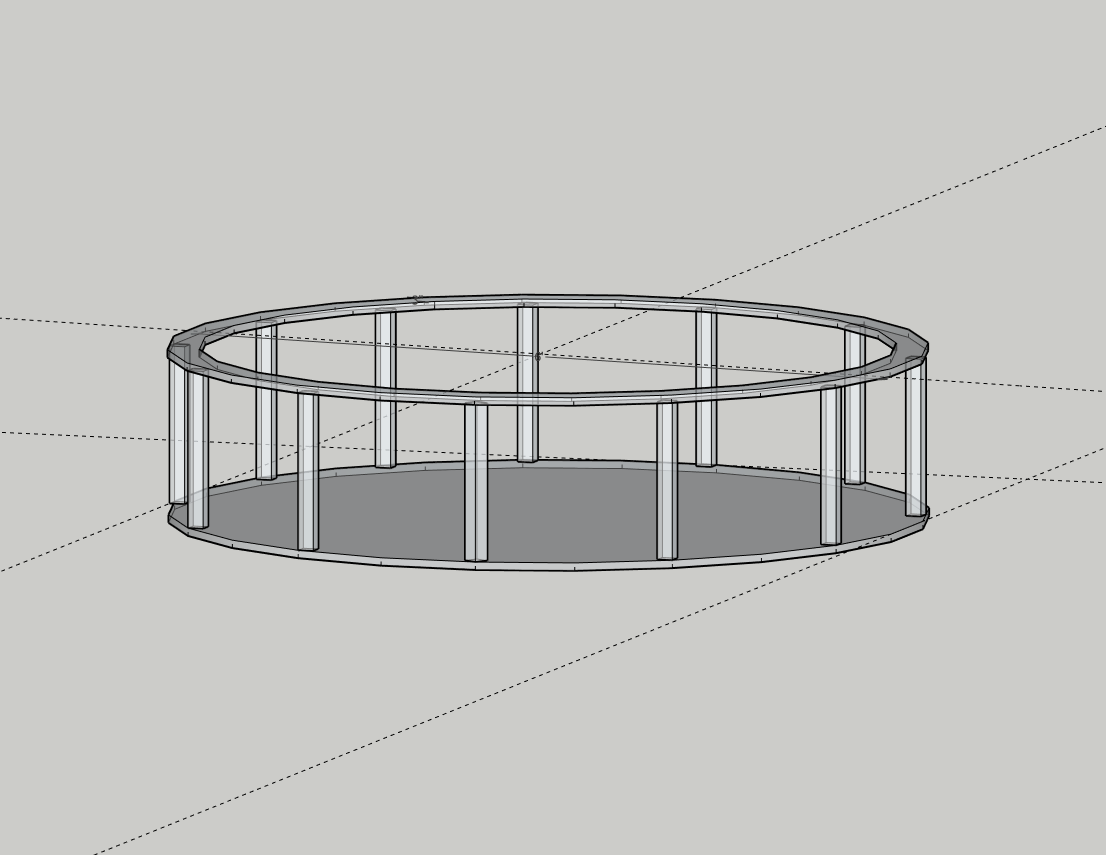
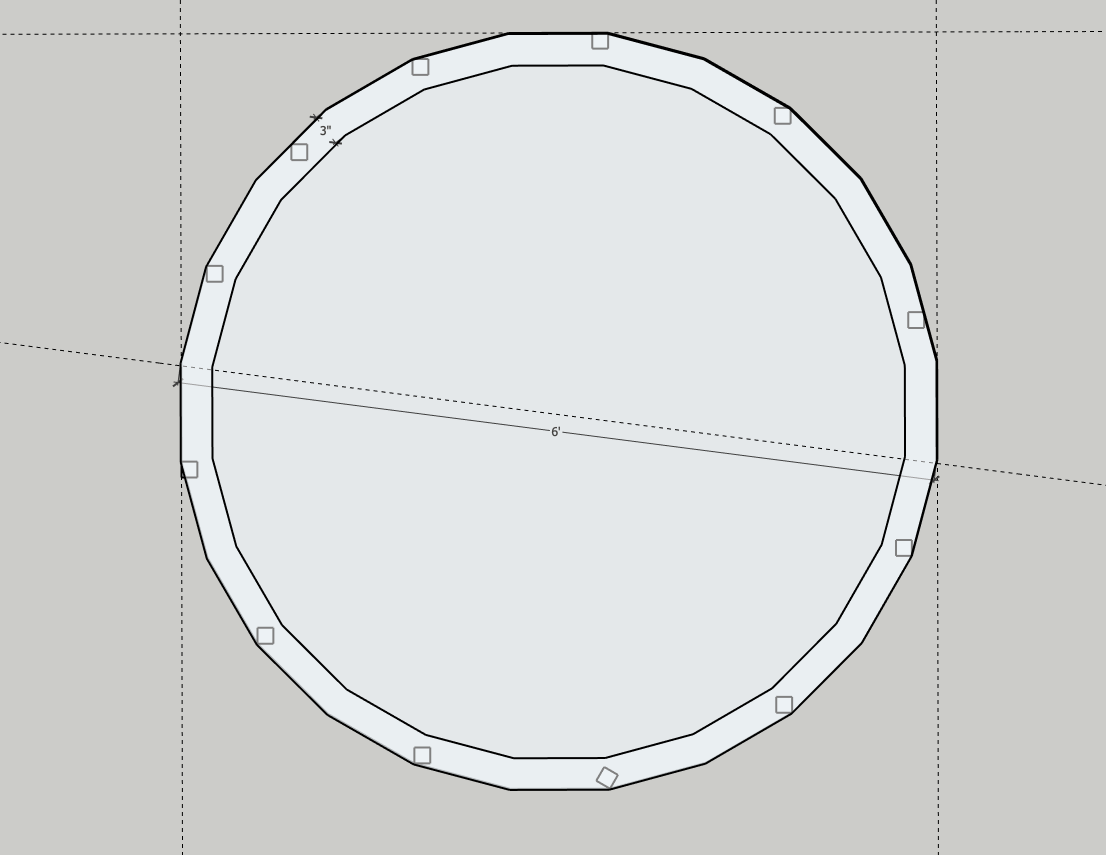
Step 1: Cut the Circular Base
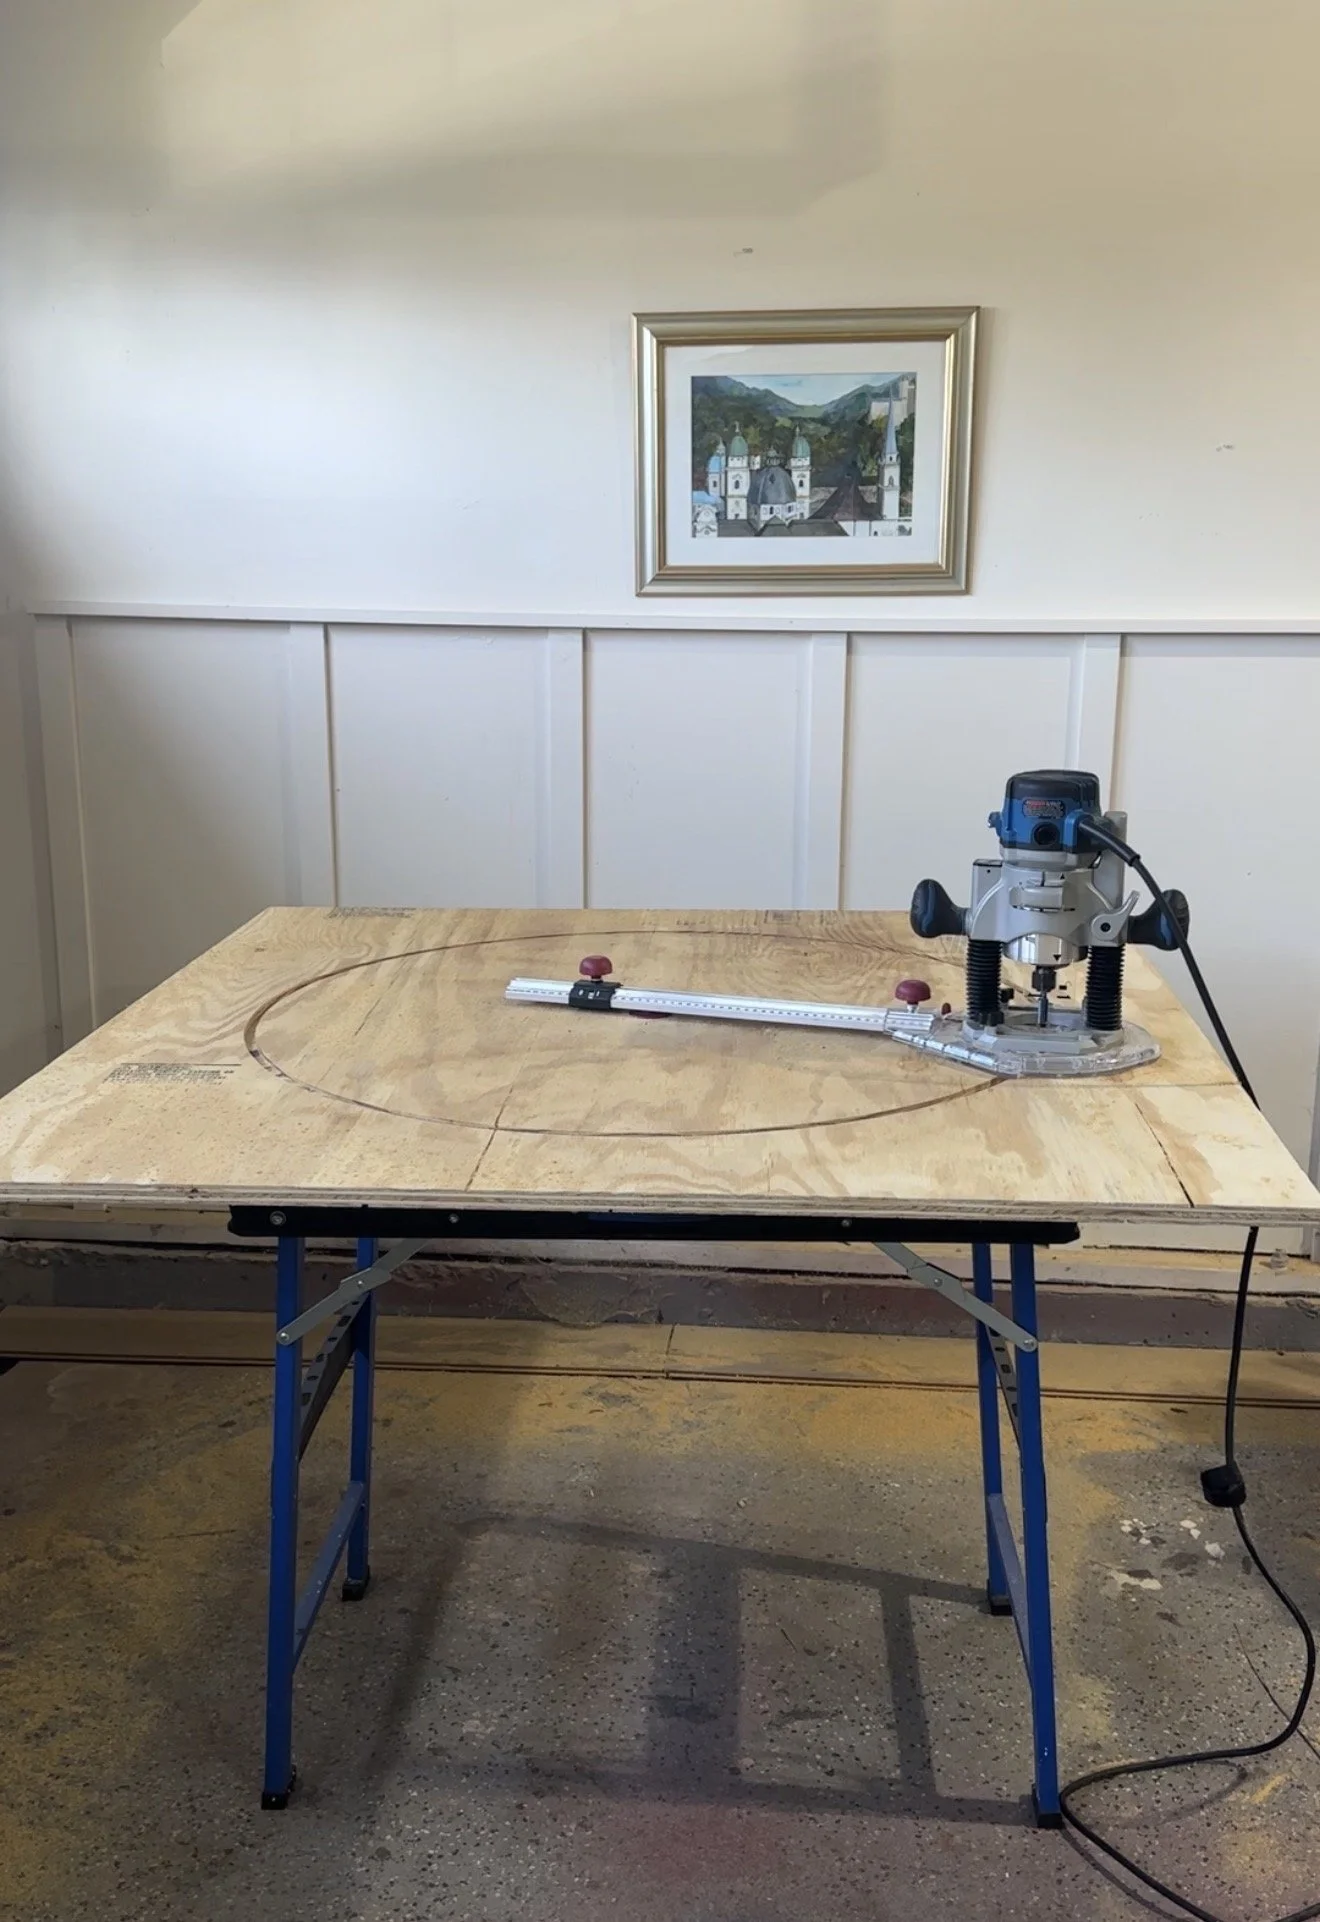
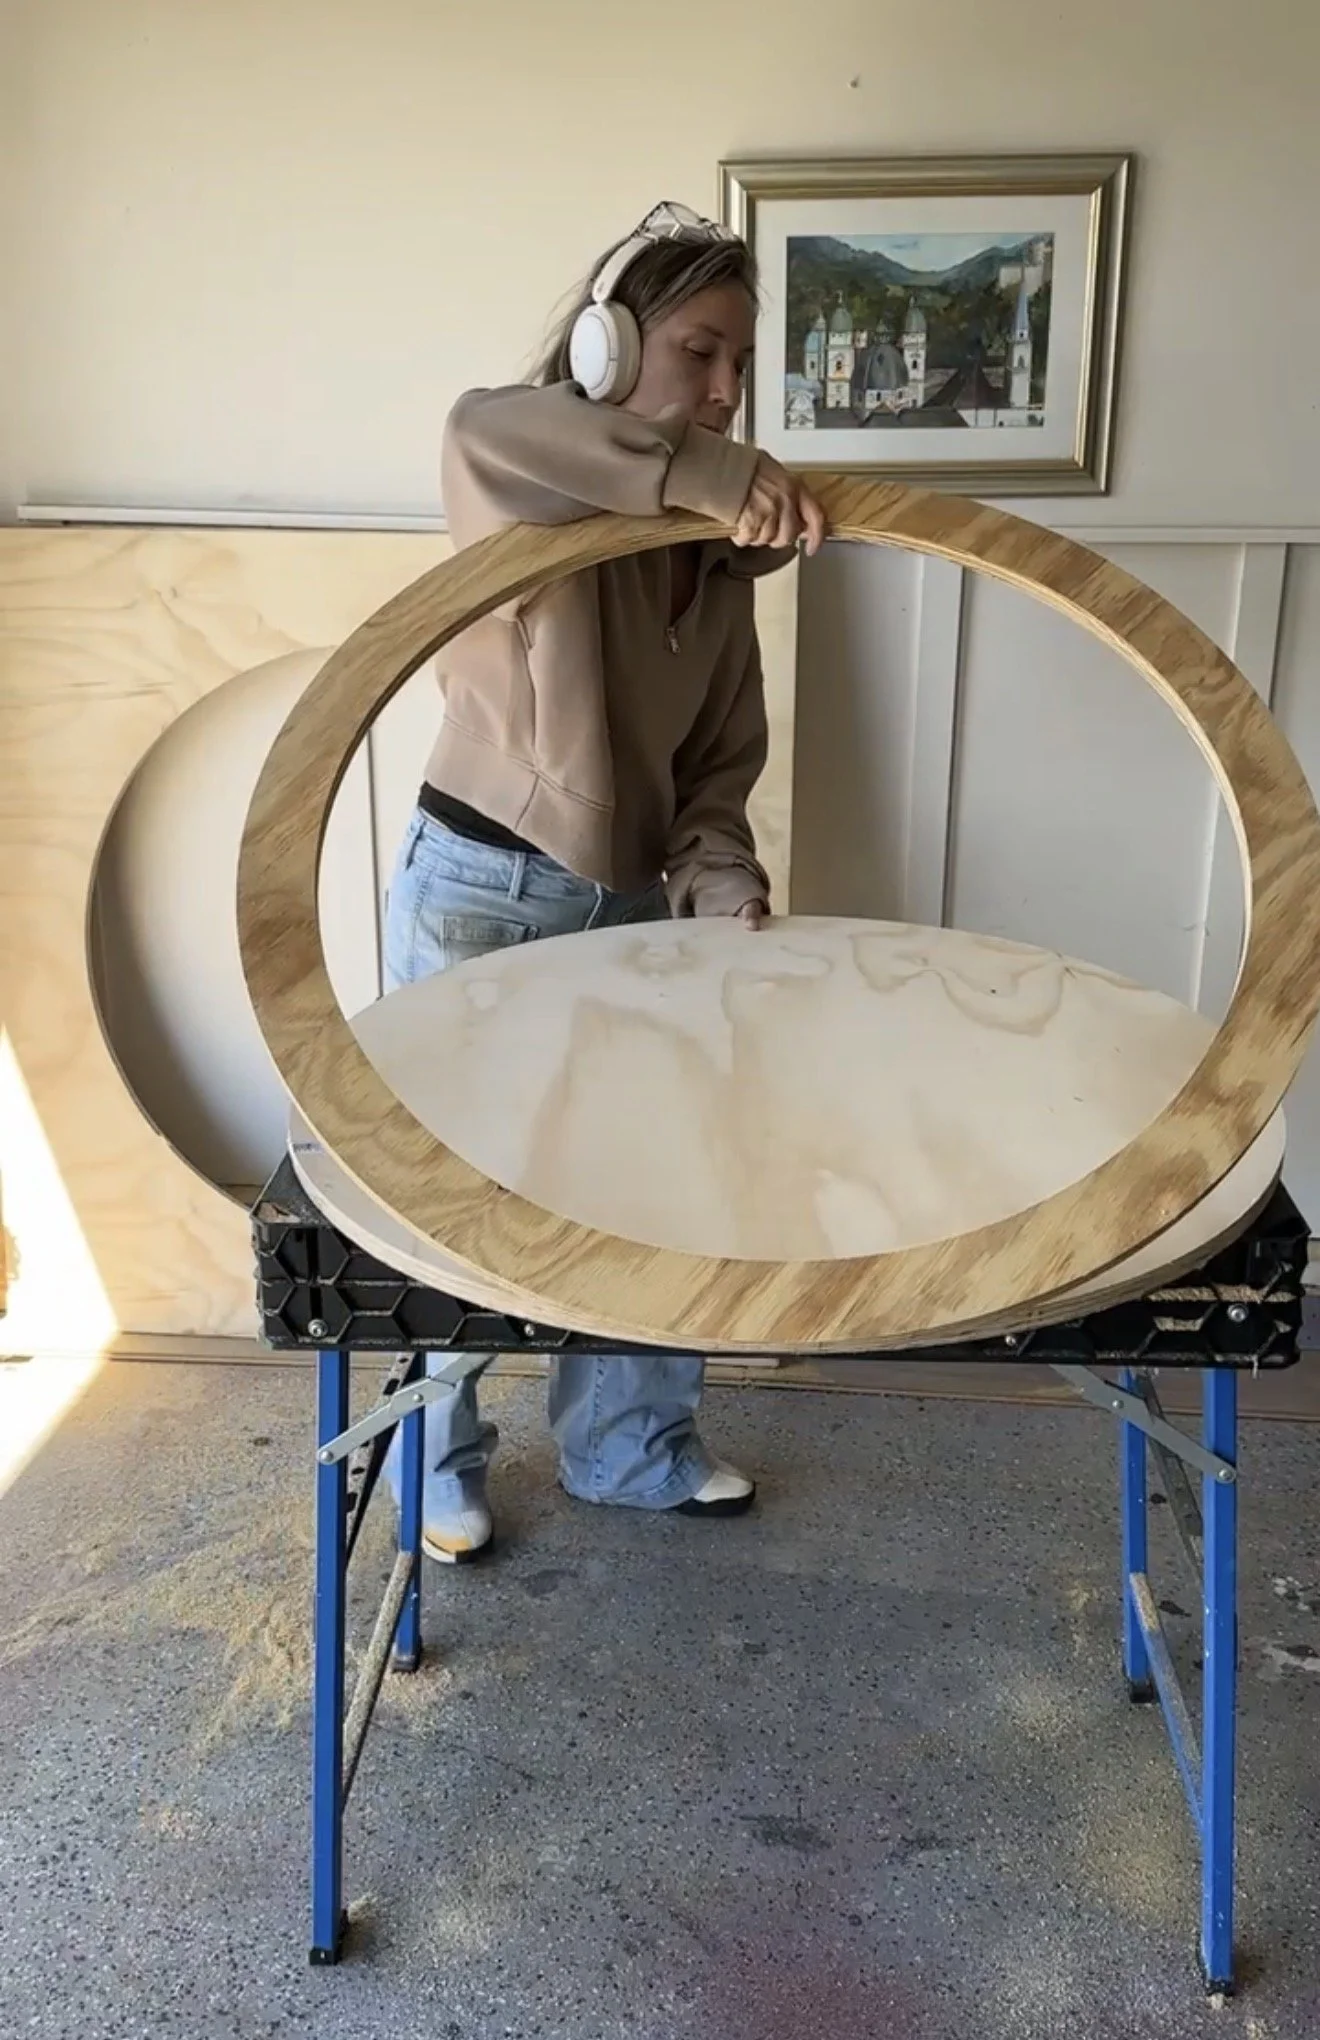
To start, I used my router with a circle jig to cut two 36" circles out of 3/4" plywood.
One circle remained whole and became the bottom of the coffee table.
The second circle became the top support ring. Instead of leaving it solid, I cut out the center so that it created a 3" wide circular ring. This keeps the structure strong while allowing the center to remain open for storage.
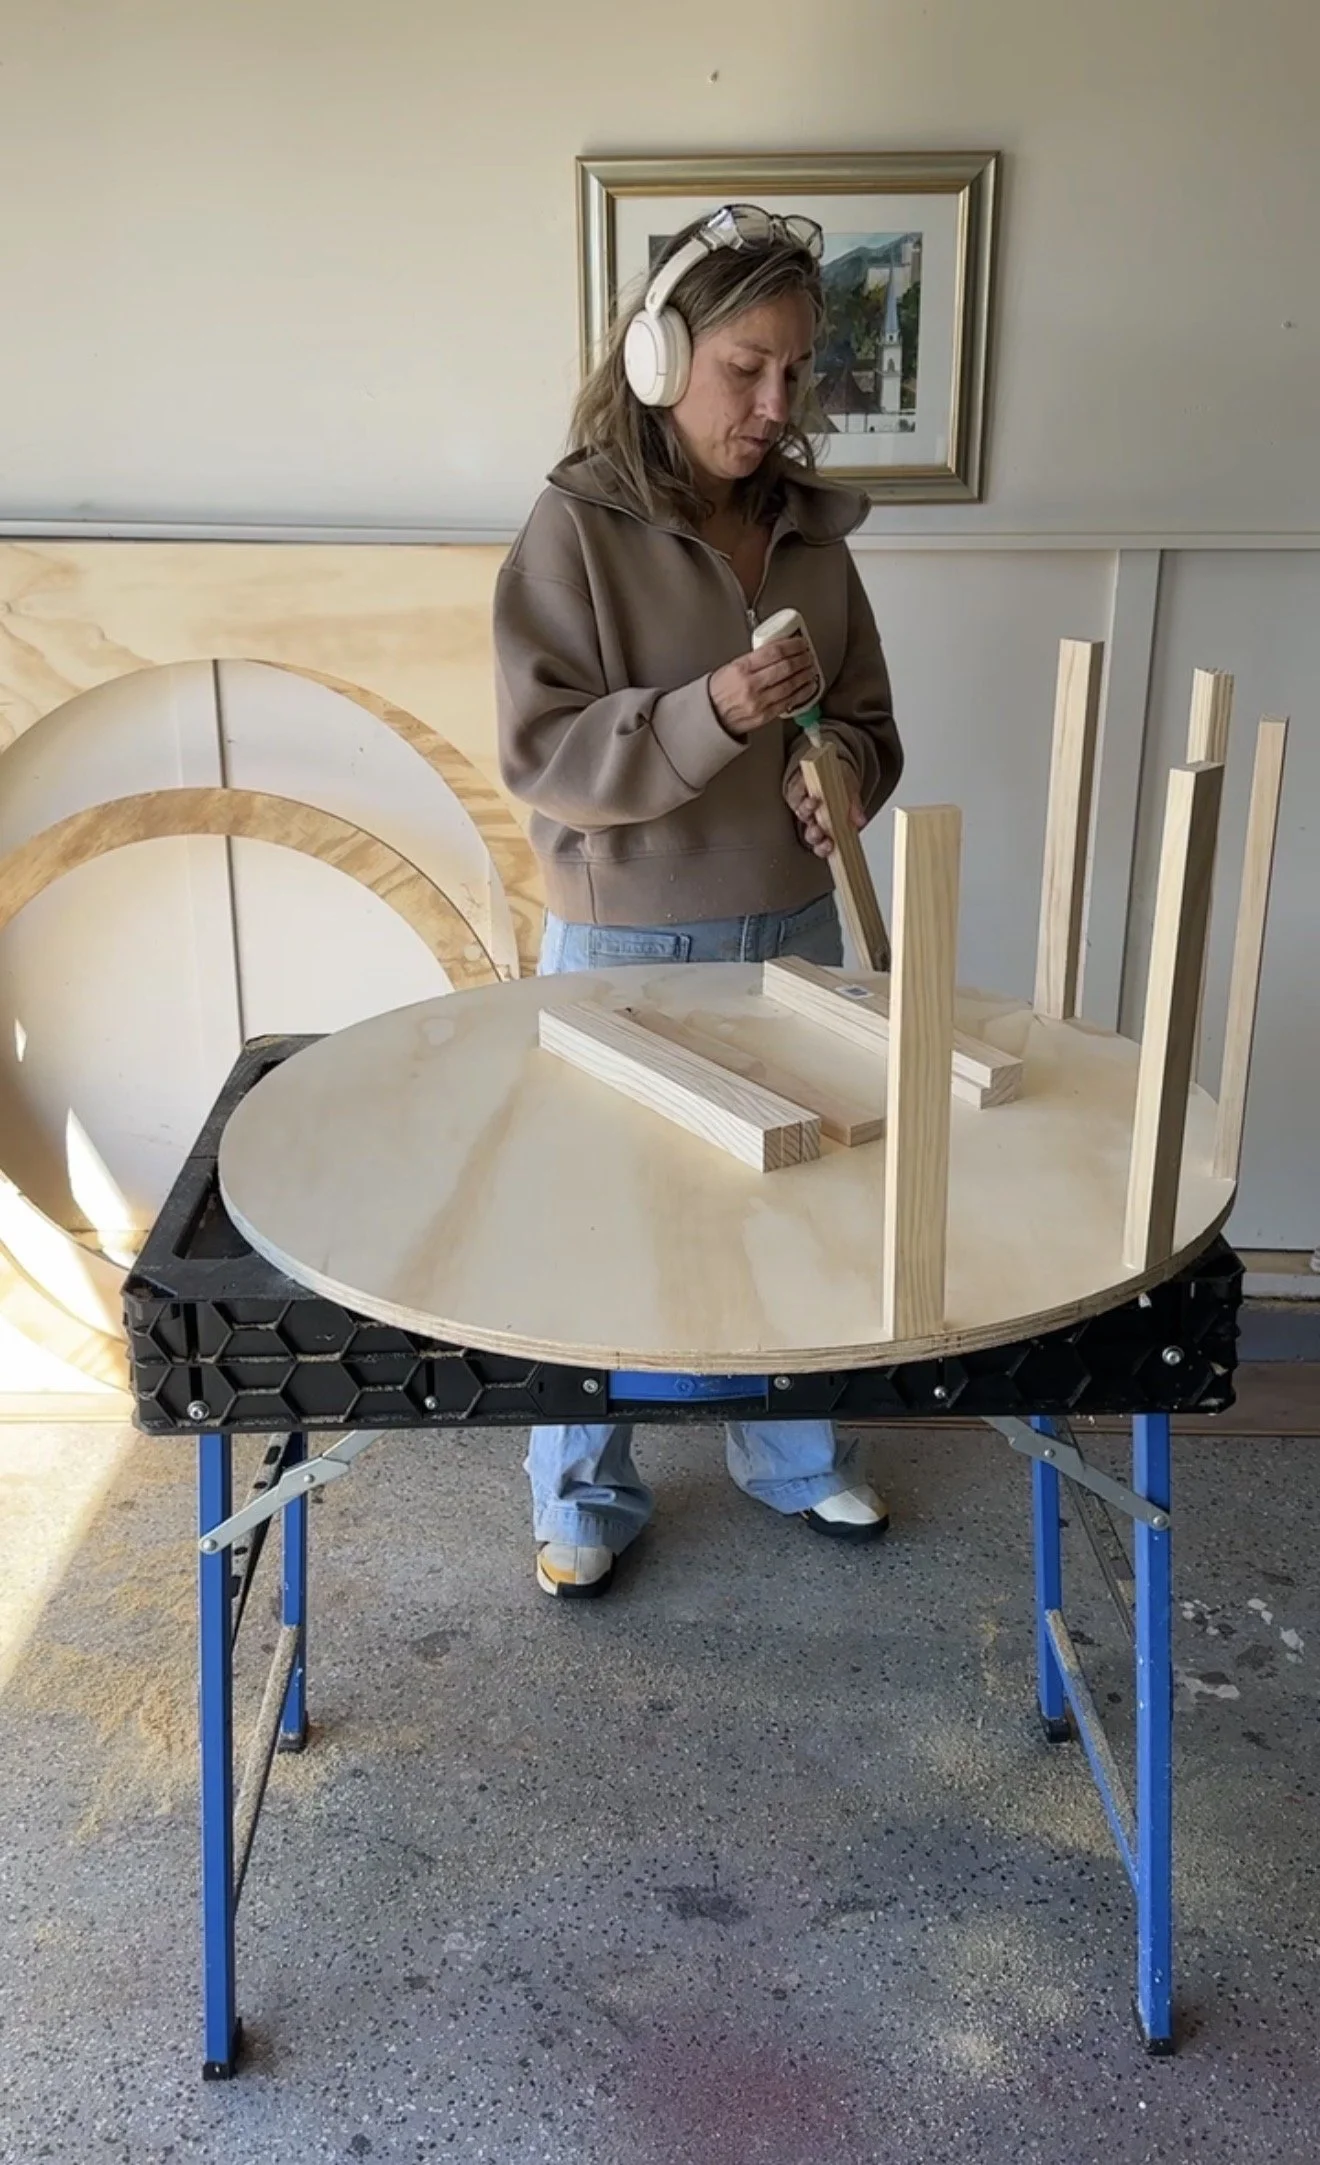
Step 2: Build the Internal Frame
Next, I cut 1x2 boards that would act as the internal structure.
Because the top and bottom plywood together equal 1.5 inches, I subtracted that from my desired table height.
Final cut length: 15 inches
I cut 12 pieces.
Then I:
Applied wood glue to the bottom of each piece
Attached them around the outer edge of the bottom circle
Let the glue dry completely
Once dry, I applied glue to the tops of the 1x2s and carefully set the top ring onto them.
To reinforce everything, I used 1.25" brad nails to secure the ring to the vertical supports.
At this point, the basic round table structure was complete.
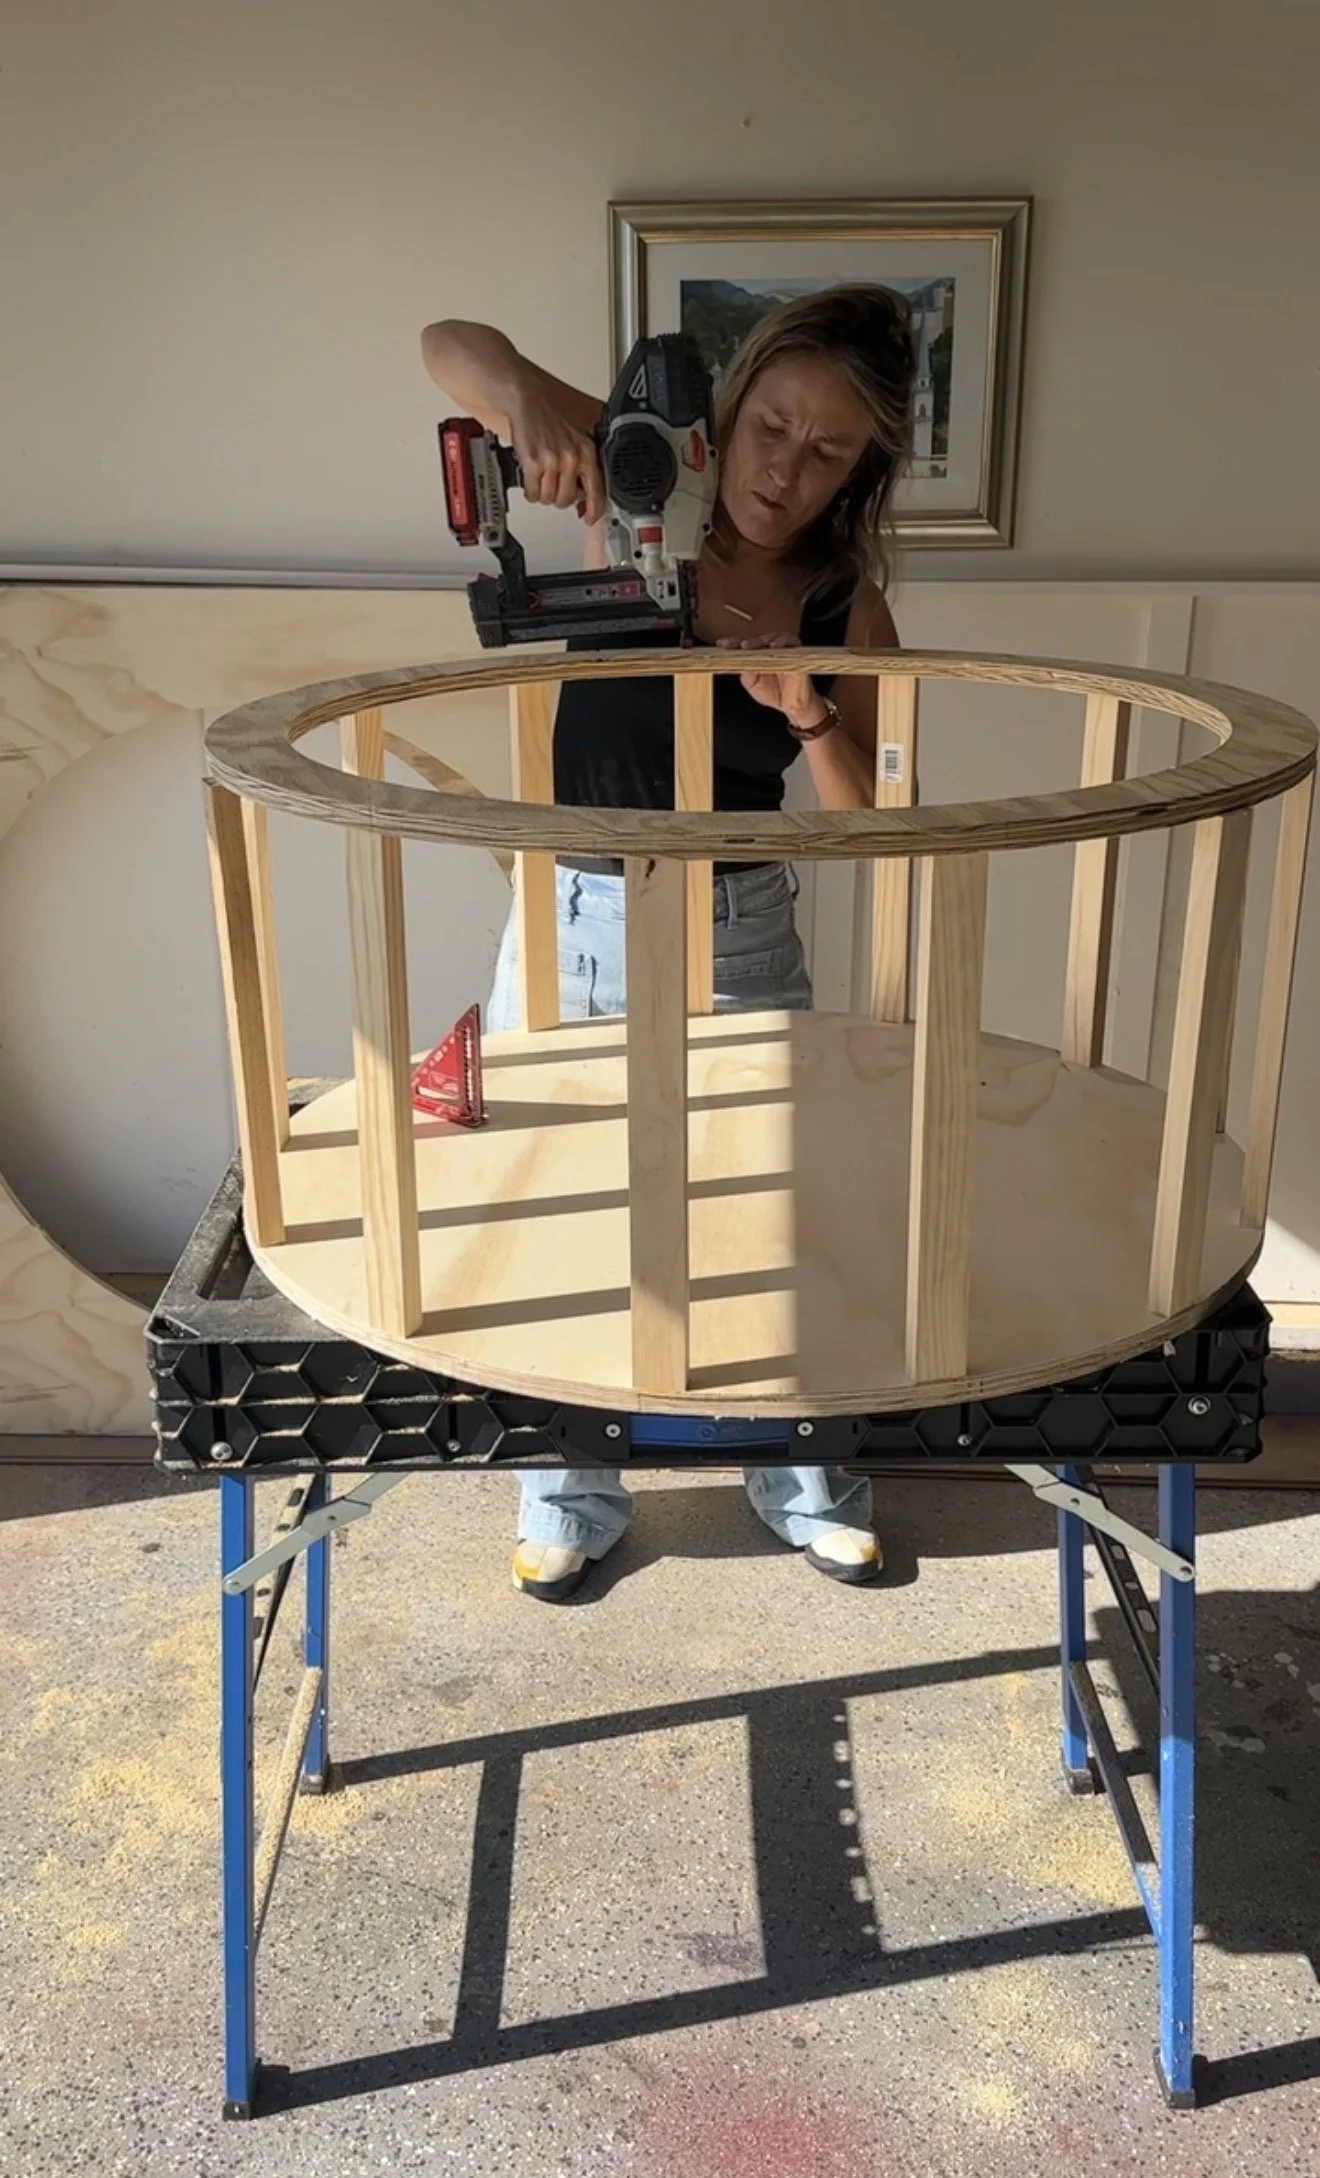
The spacing of the supports doesn’t have to be accurate. It’s easier to put a little more so that when you attach the pole wrap, it has a more secure area to attach to.
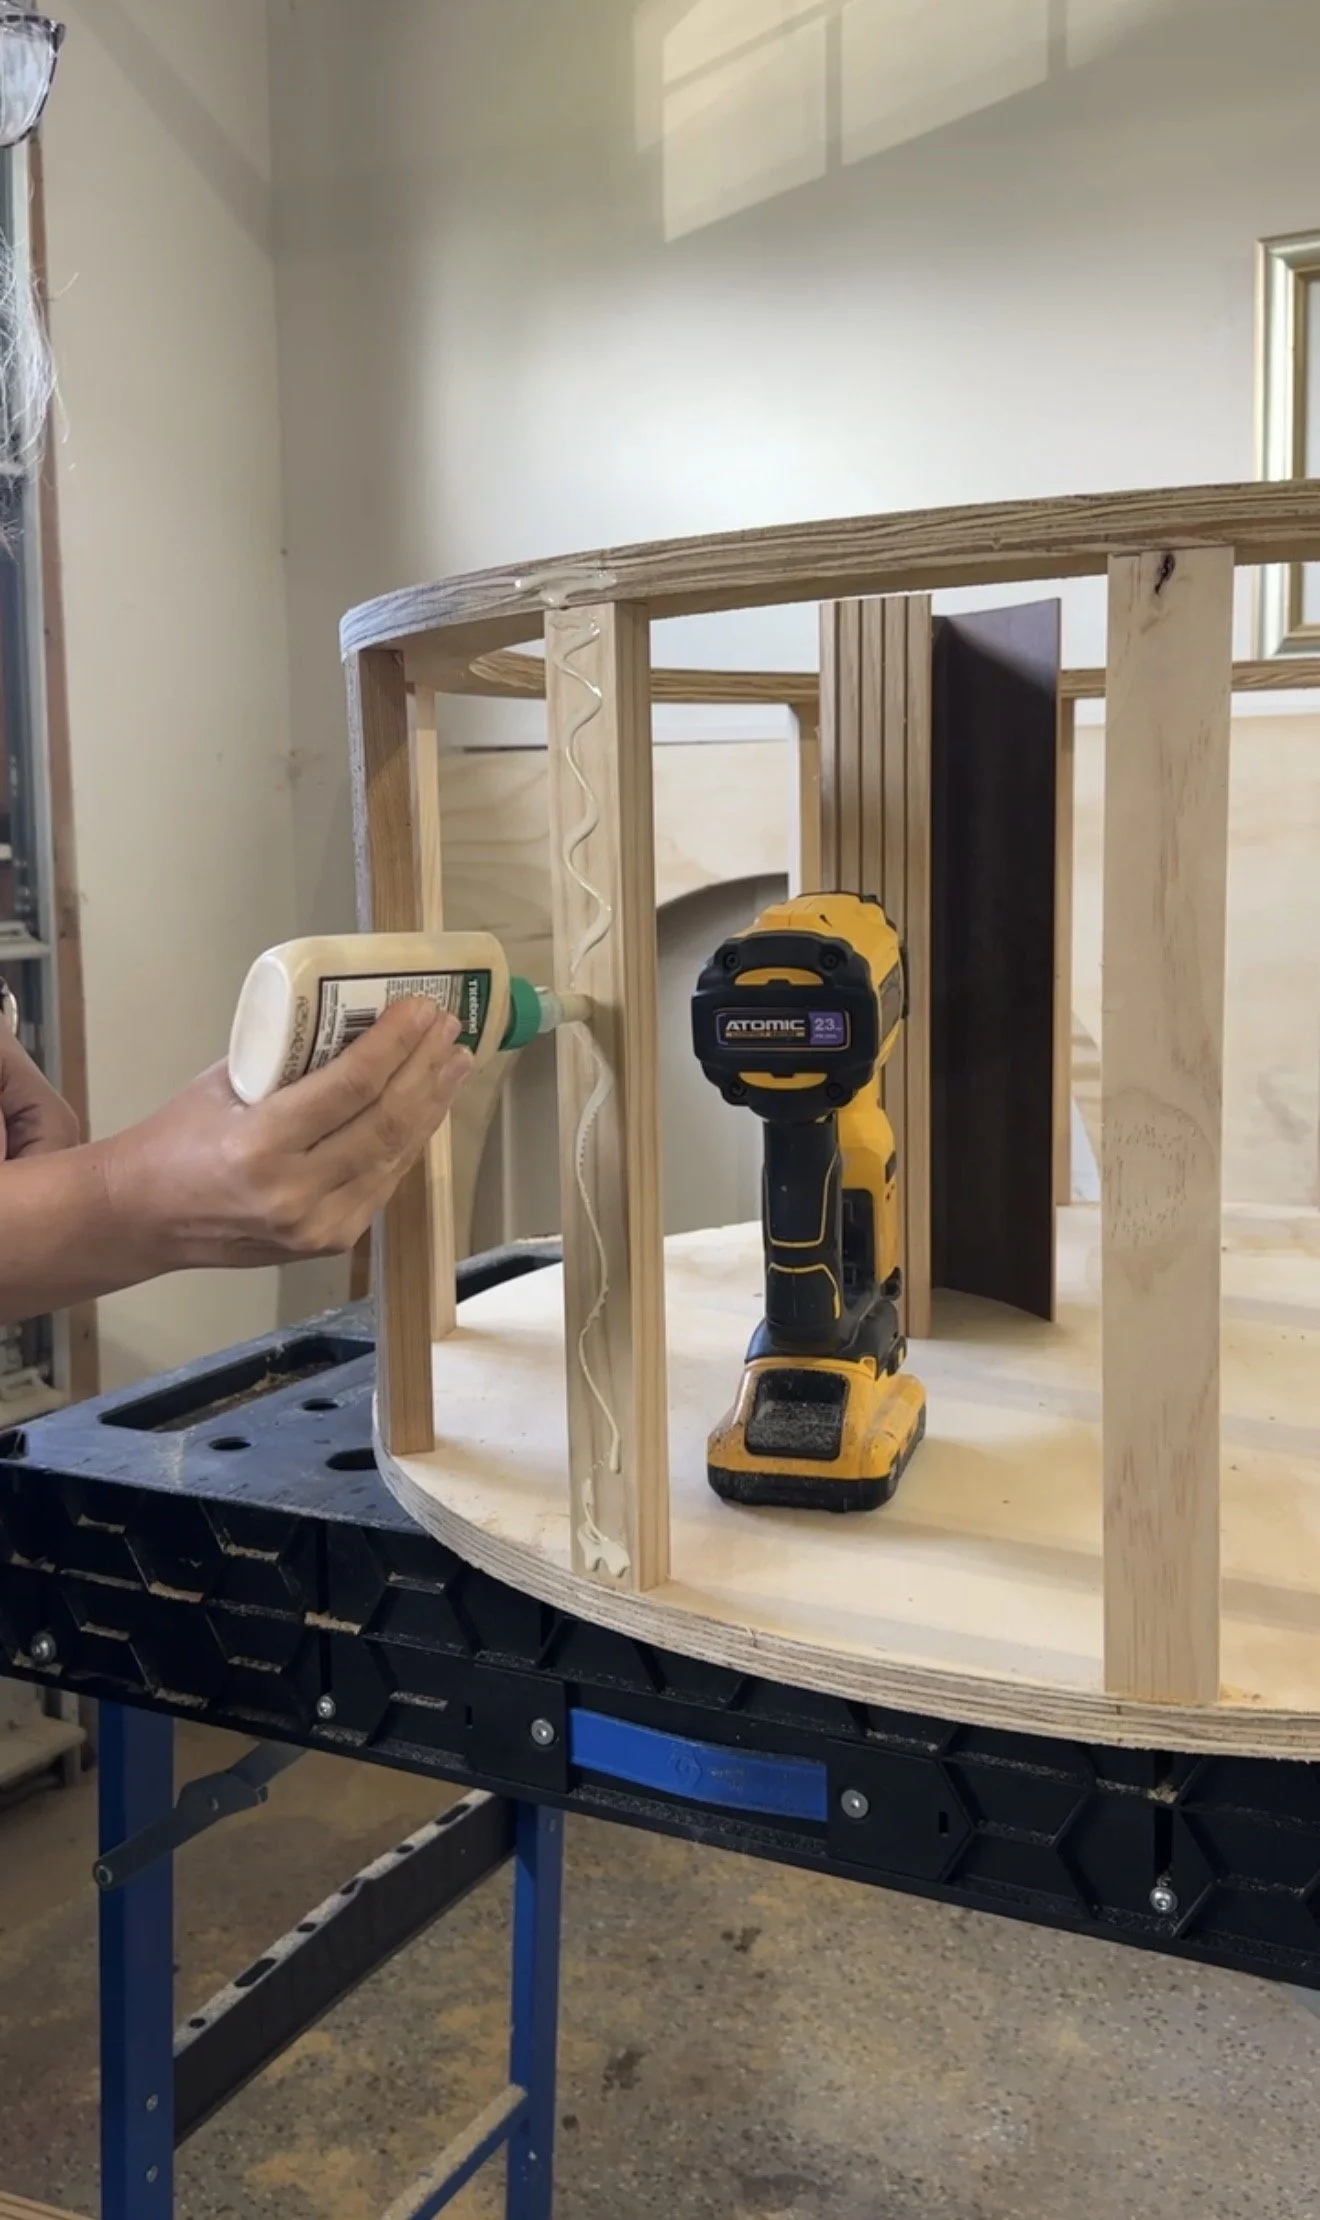
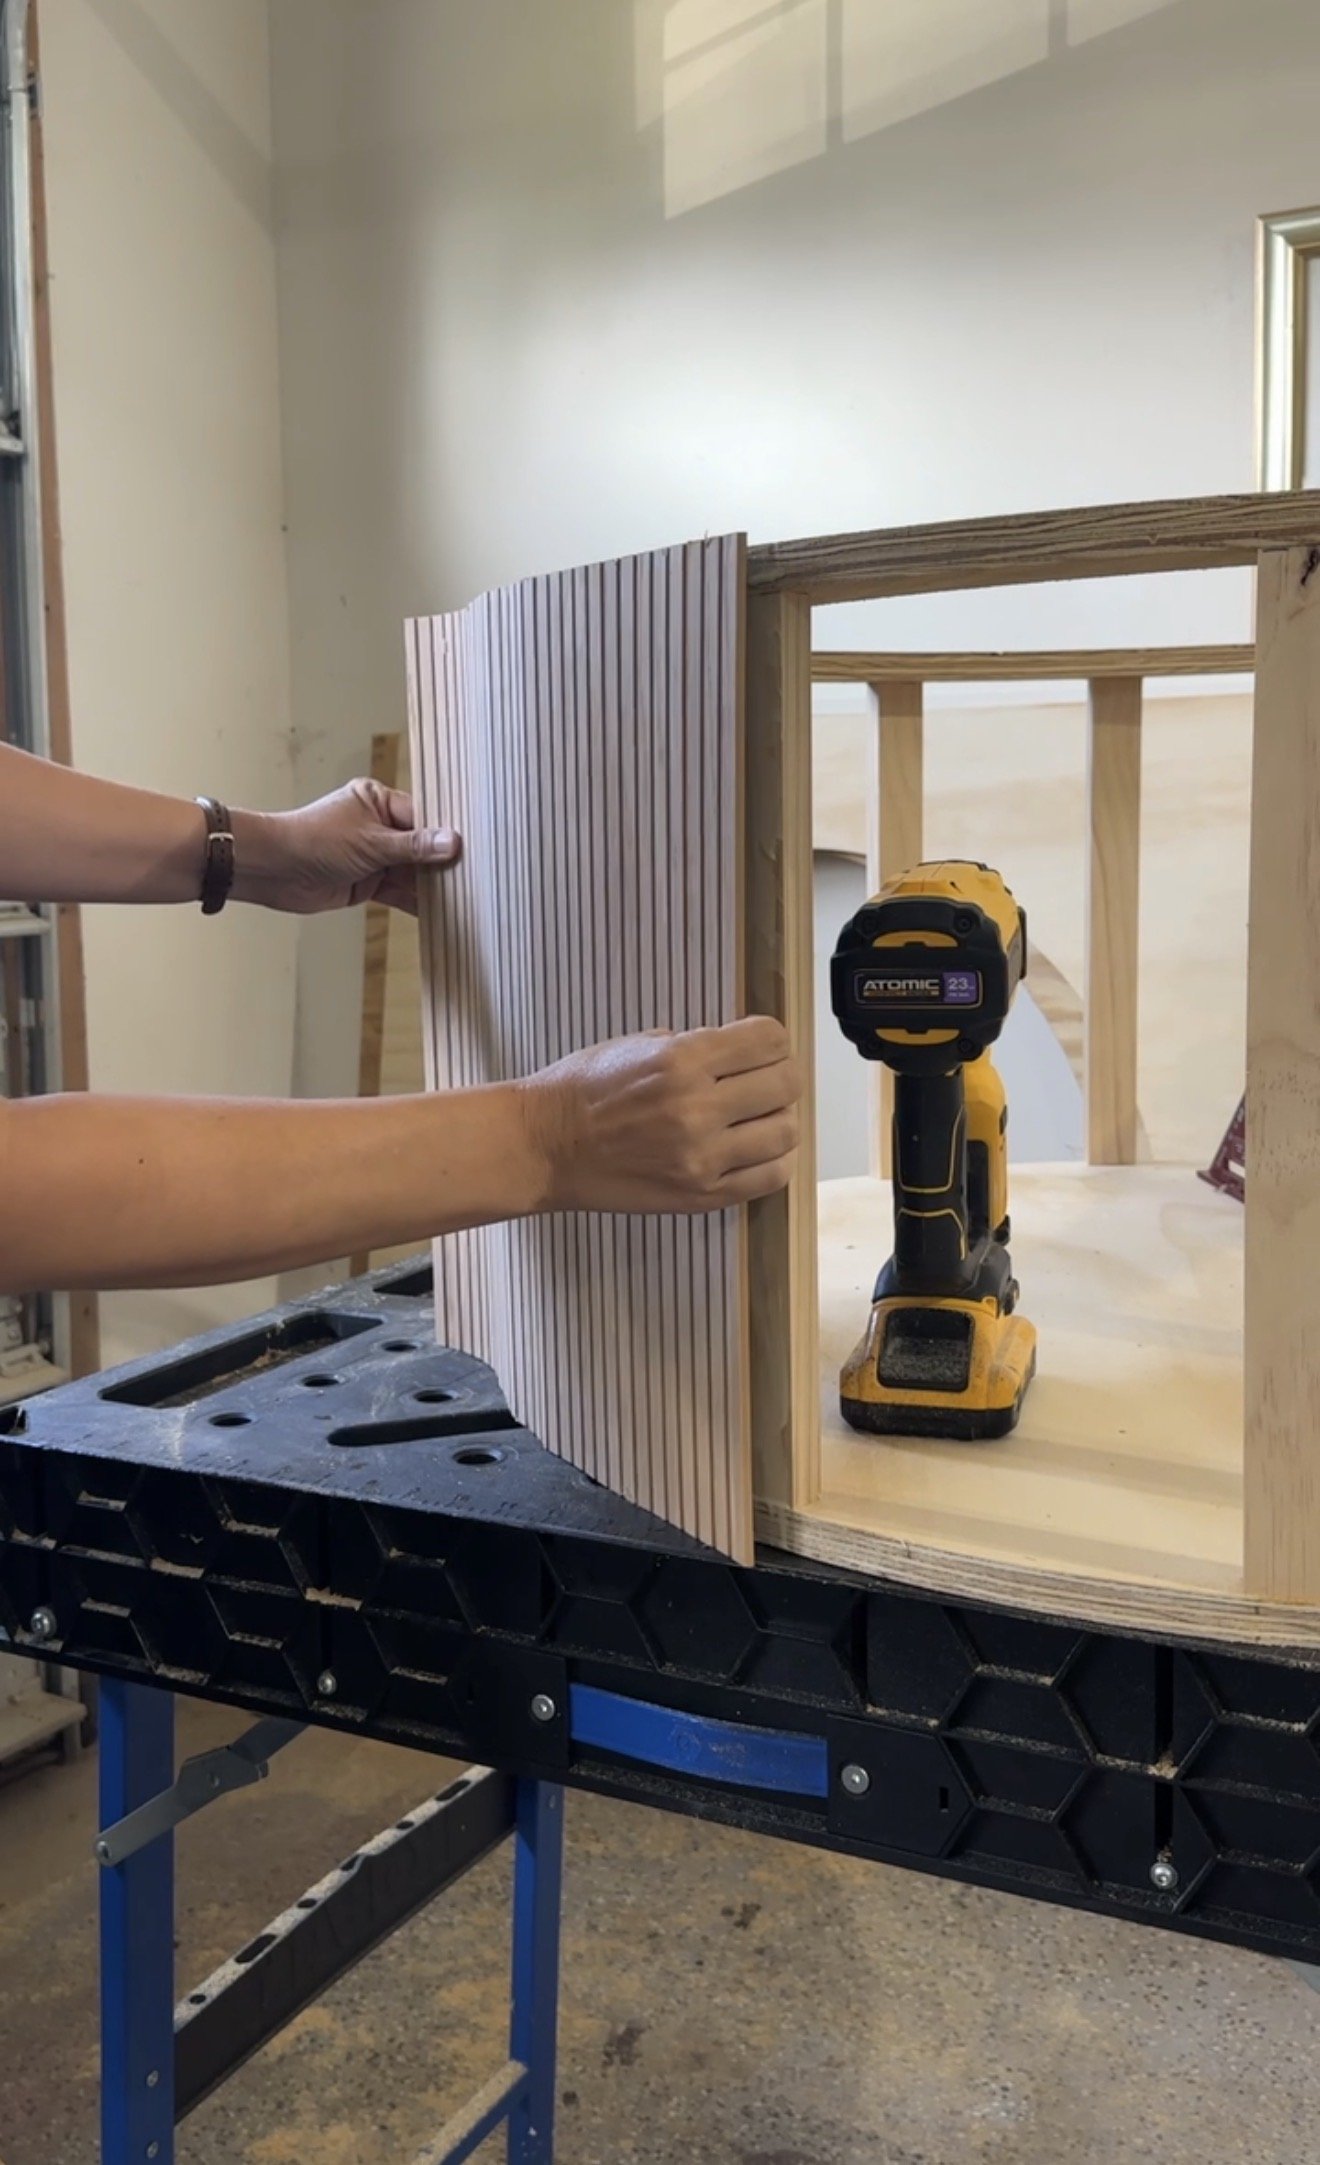
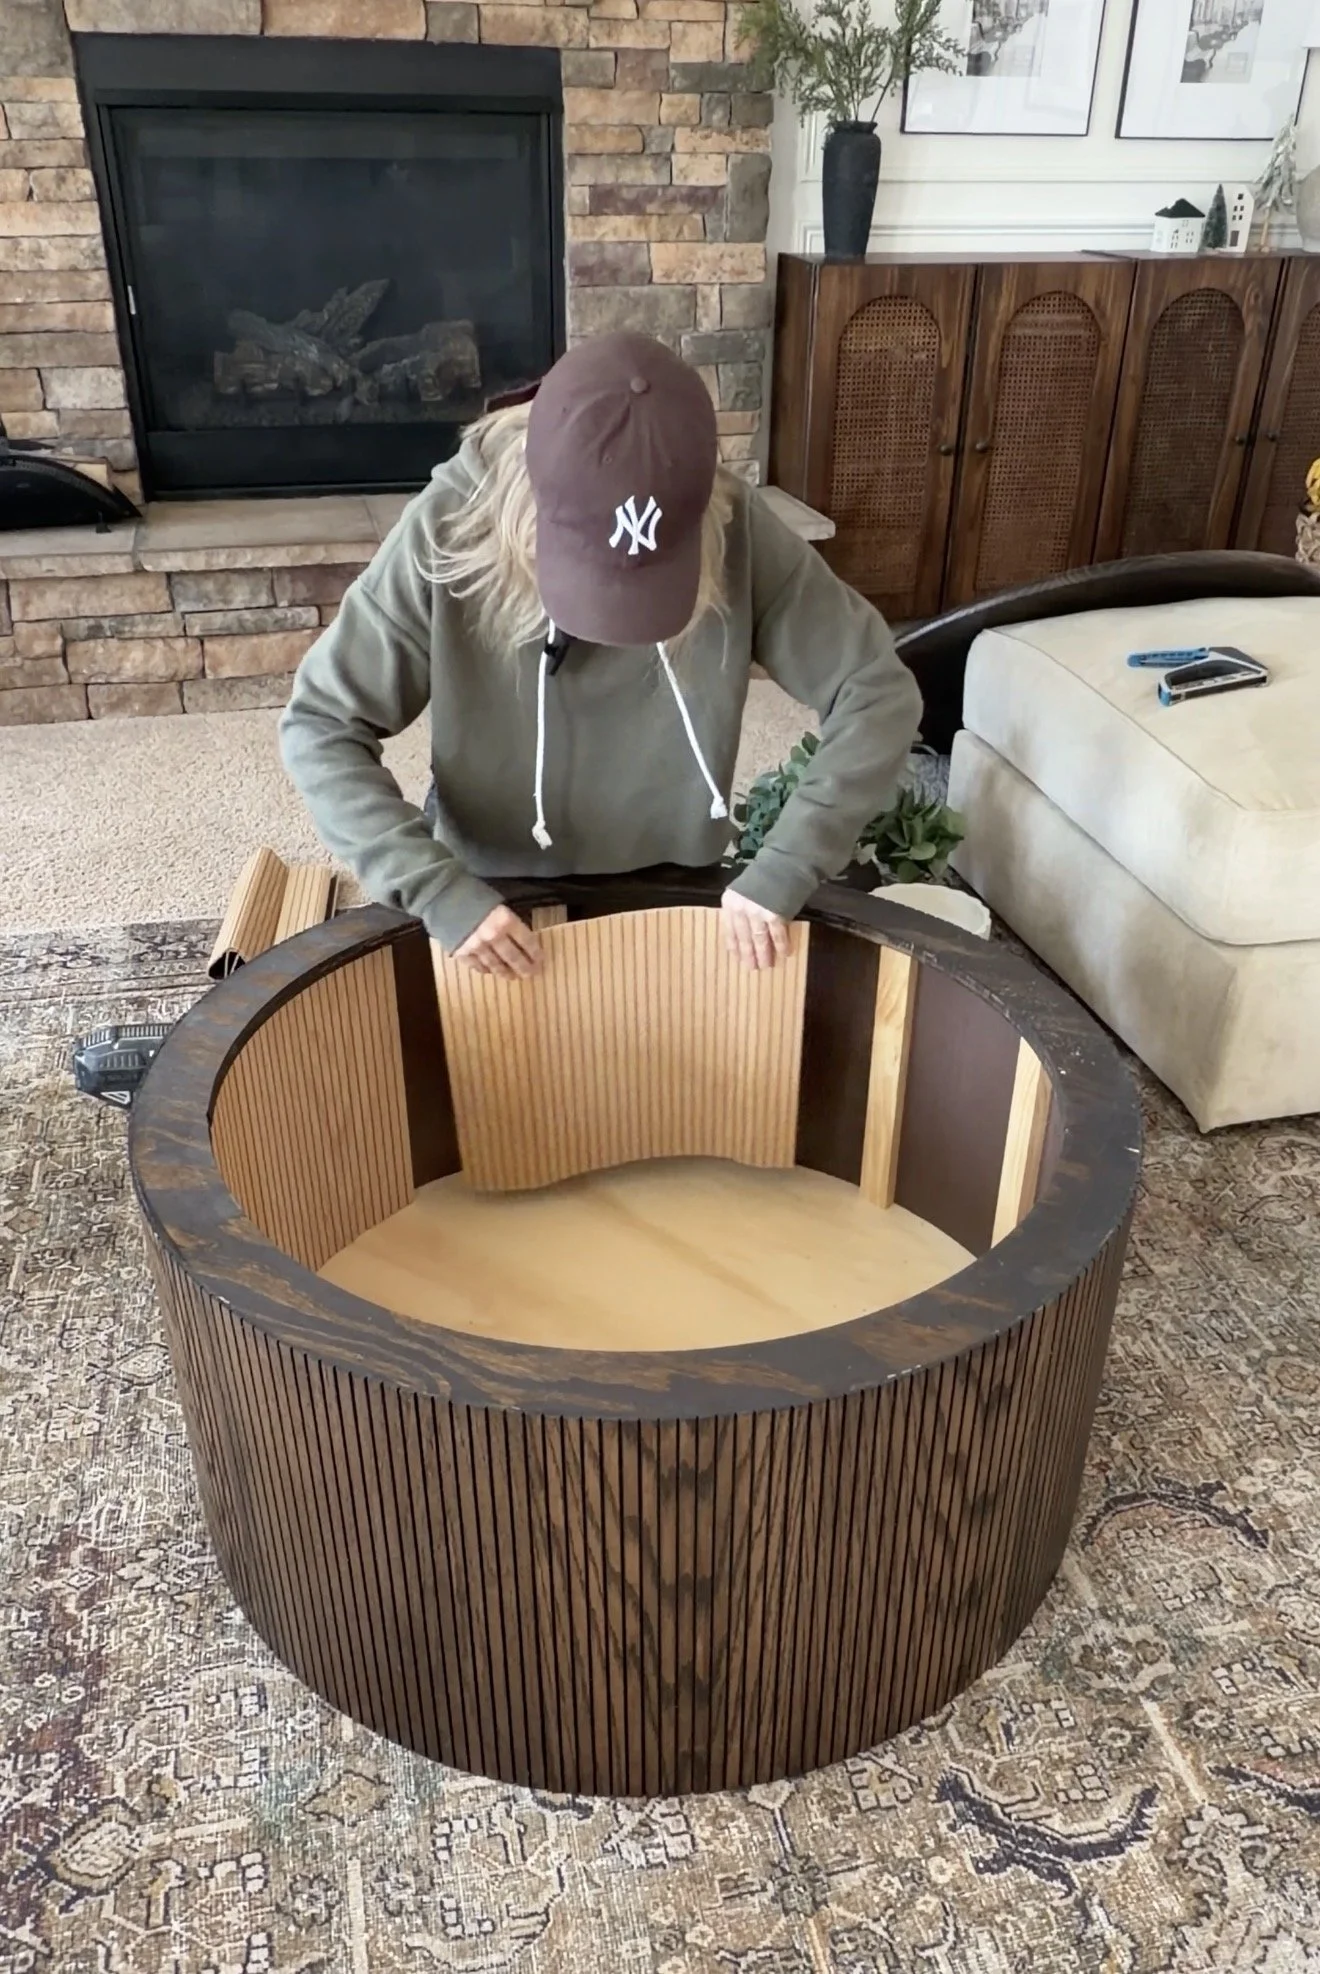
Step 3: Add the Fluted Detail with Pole Wrap
To create the fluted look, I used pole wrap.
I cut the pole wrap to the final height of the table: 16.5 inches
Then I:
Applied wood glue to the outside of the 1x2 frame
Wrapped the pole wrap around the table
Secured it temporarily with 23 gauge pin nails while the glue dried
This step completely transforms the table and gives it that high-end fluted furniture look.
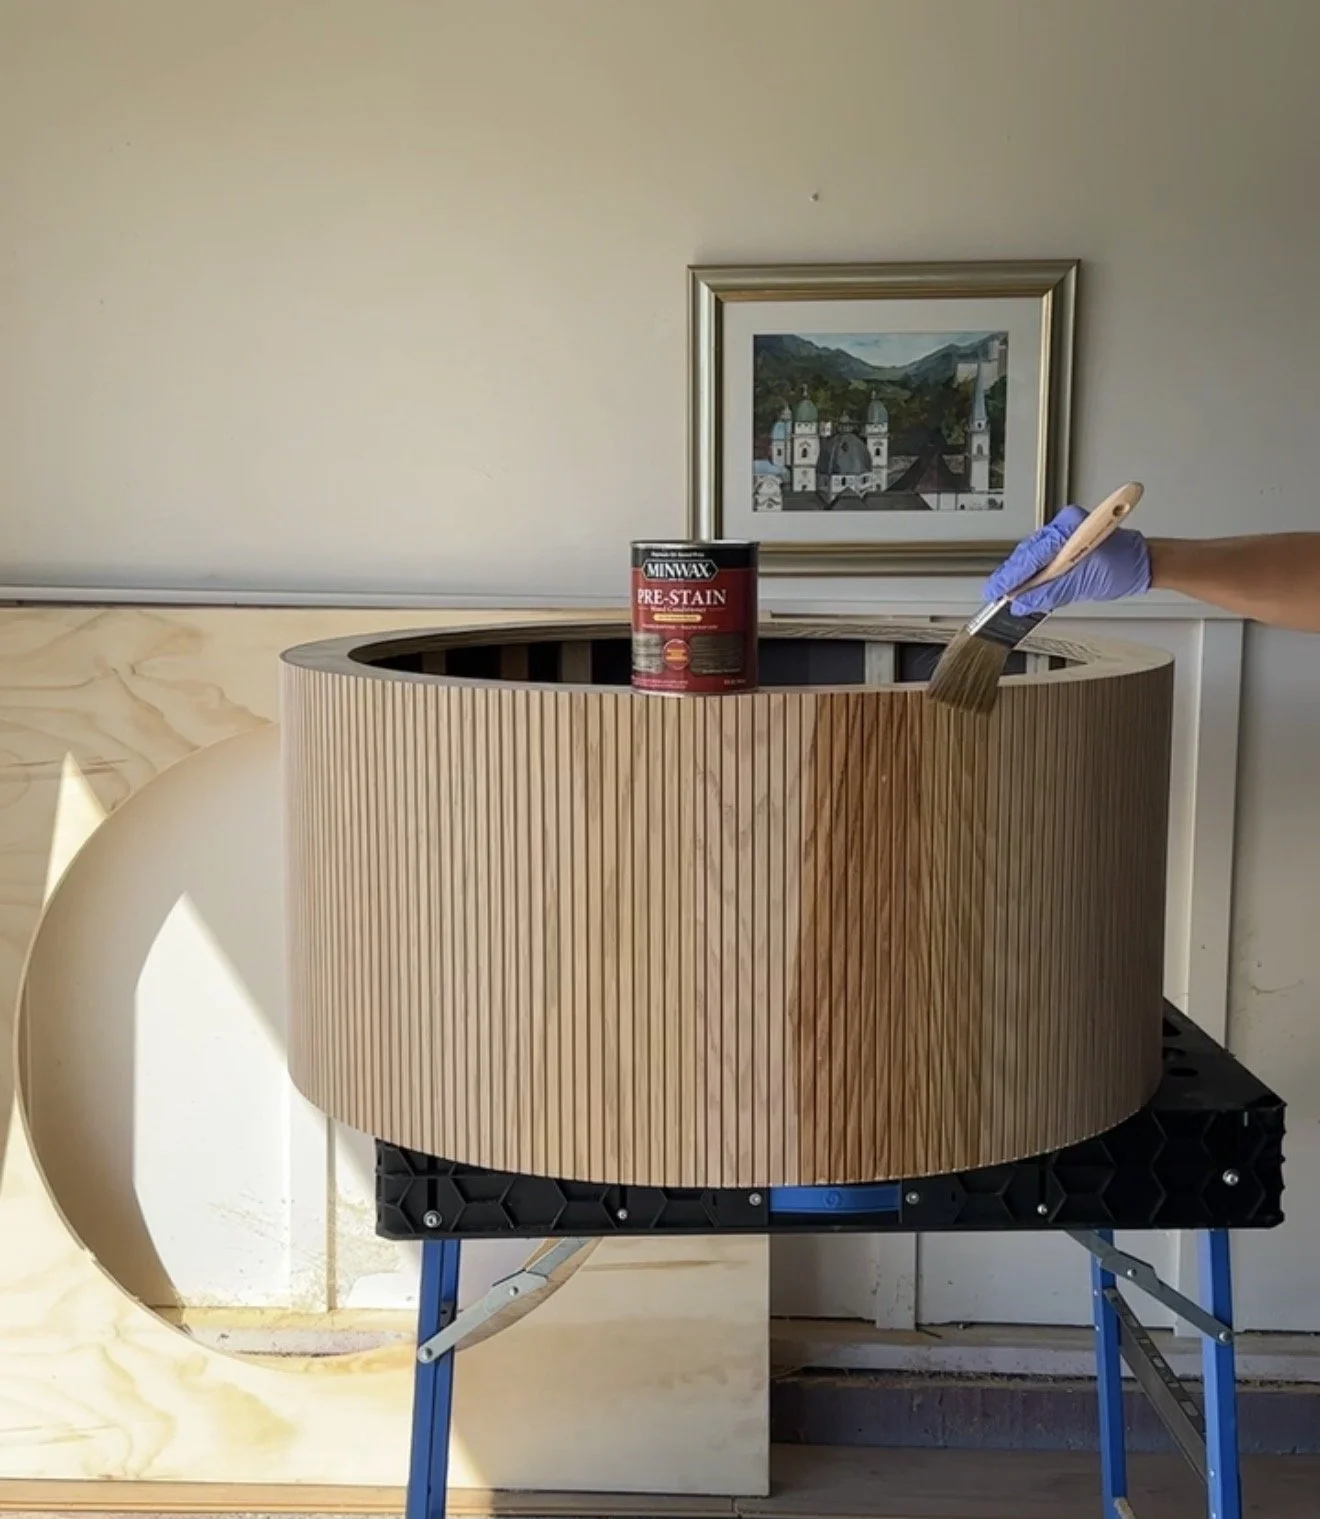
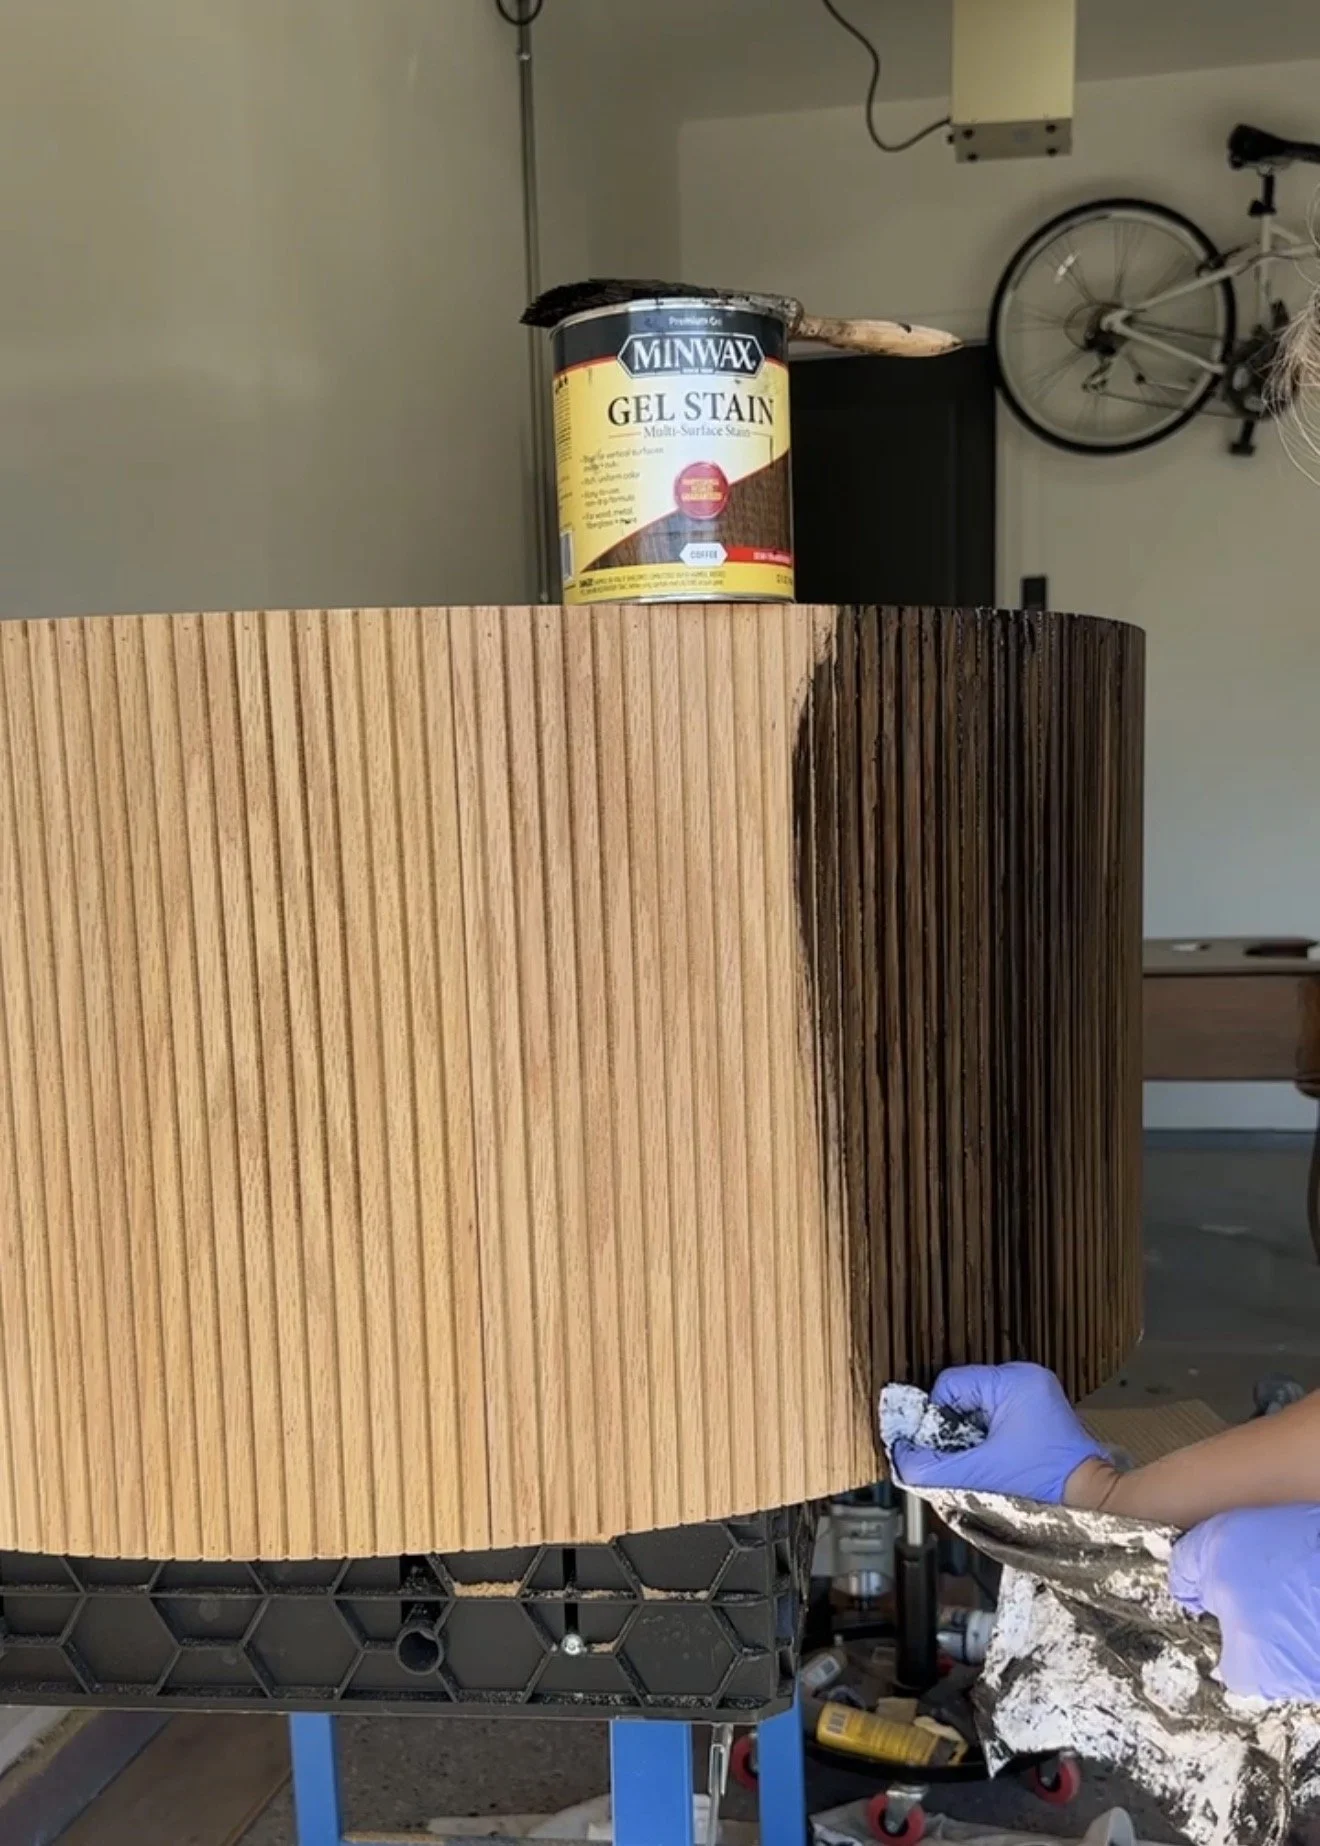
Step 4: Stain and Seal the Table
Once the glue dried, it was time to finish the wood.
I applied:
Gel stain in Coffee by Minwax
Water-based Polycrylic (satin) by Minwax
Step 5: Create the Removable Lid
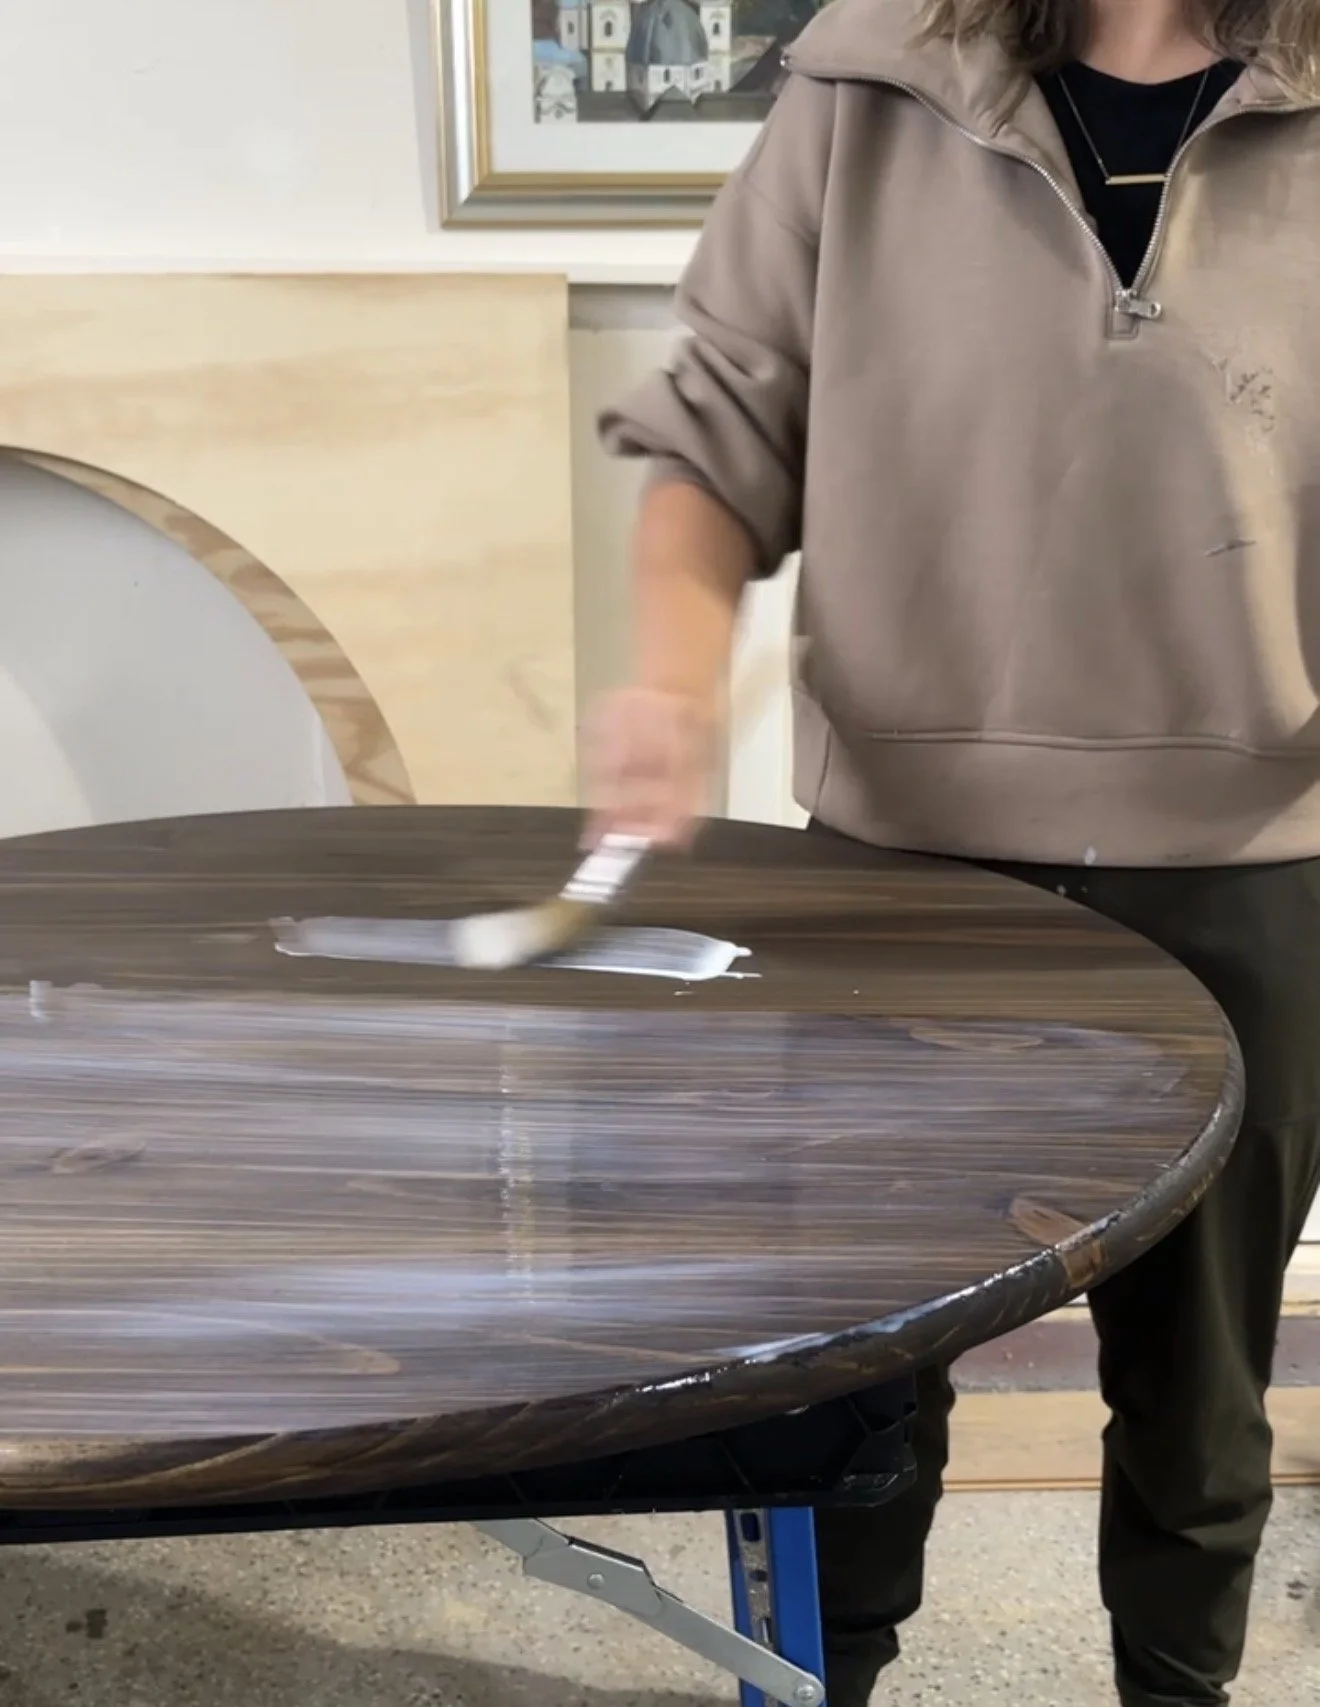
For the tabletop, I purchased a precut 36" wood round.
I finished it using the same stain and topcoat so everything matched perfectly.
This piece simply sat on top of the table, hiding the storage compartment. You can make this yourself following the same process as cutting the other circles; however, you would need to use your router to make the edges curved and finished. I found it easier to purchase the precut round.
Step 6: Finishing the Interior (My Update)
After living with the table for a bit, I realized I didn’t love the unfinished look of the inside.
So I went back and:
Stained it using Dark Walnut spray stain
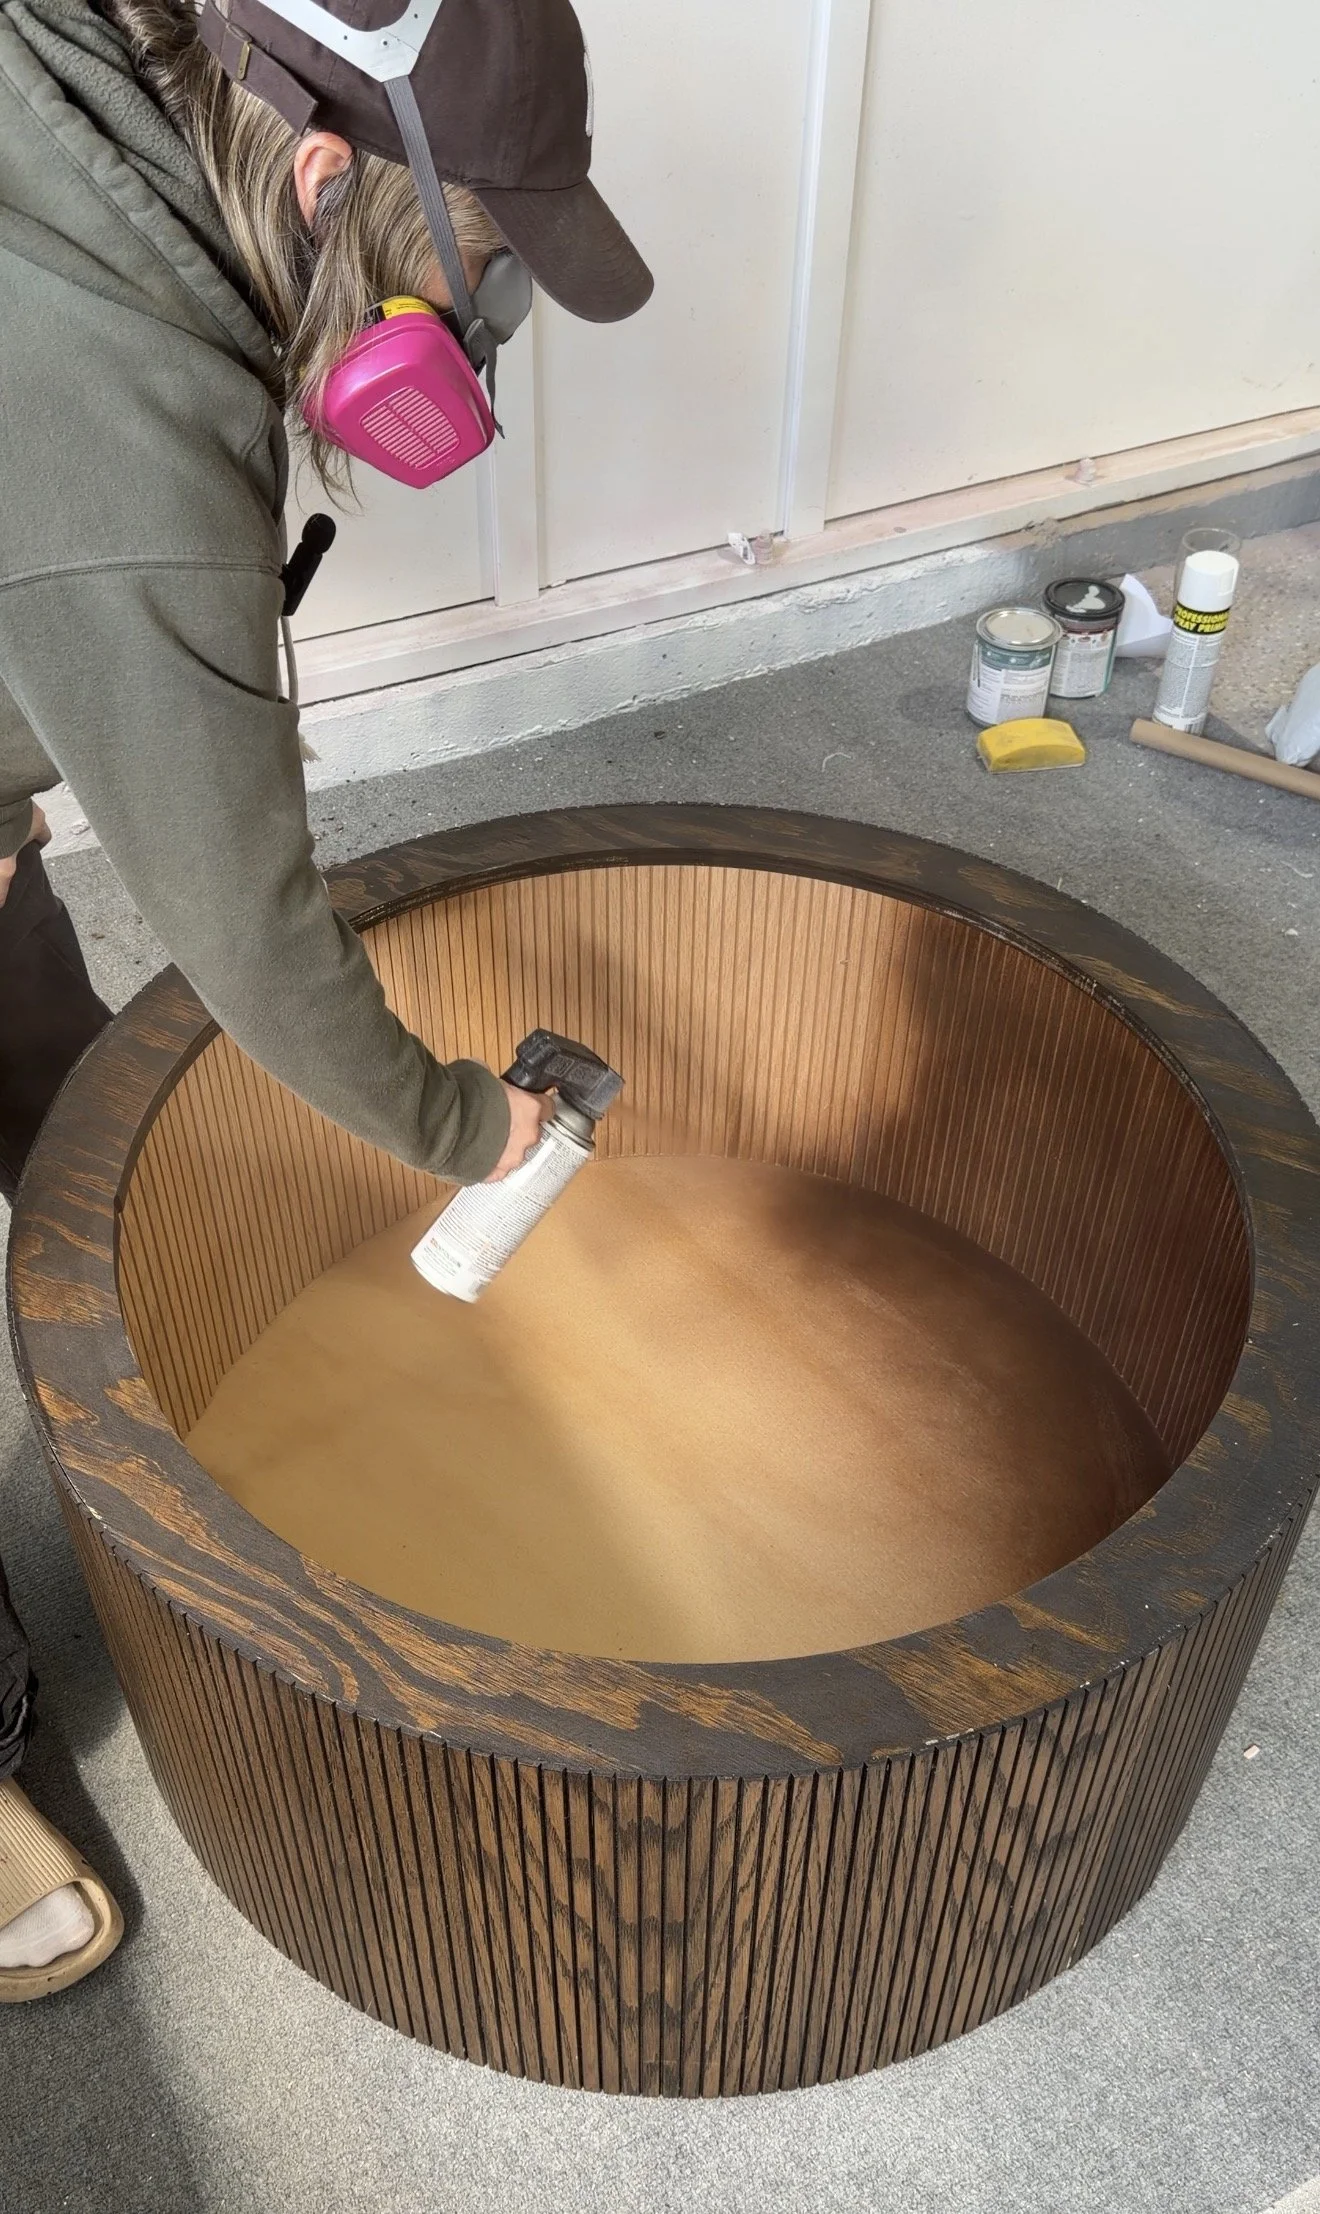
Using a spray stain made this step much easier inside the tight space. I also love using this spray can attachment! Definitely a must have if you ever use any spray paint.
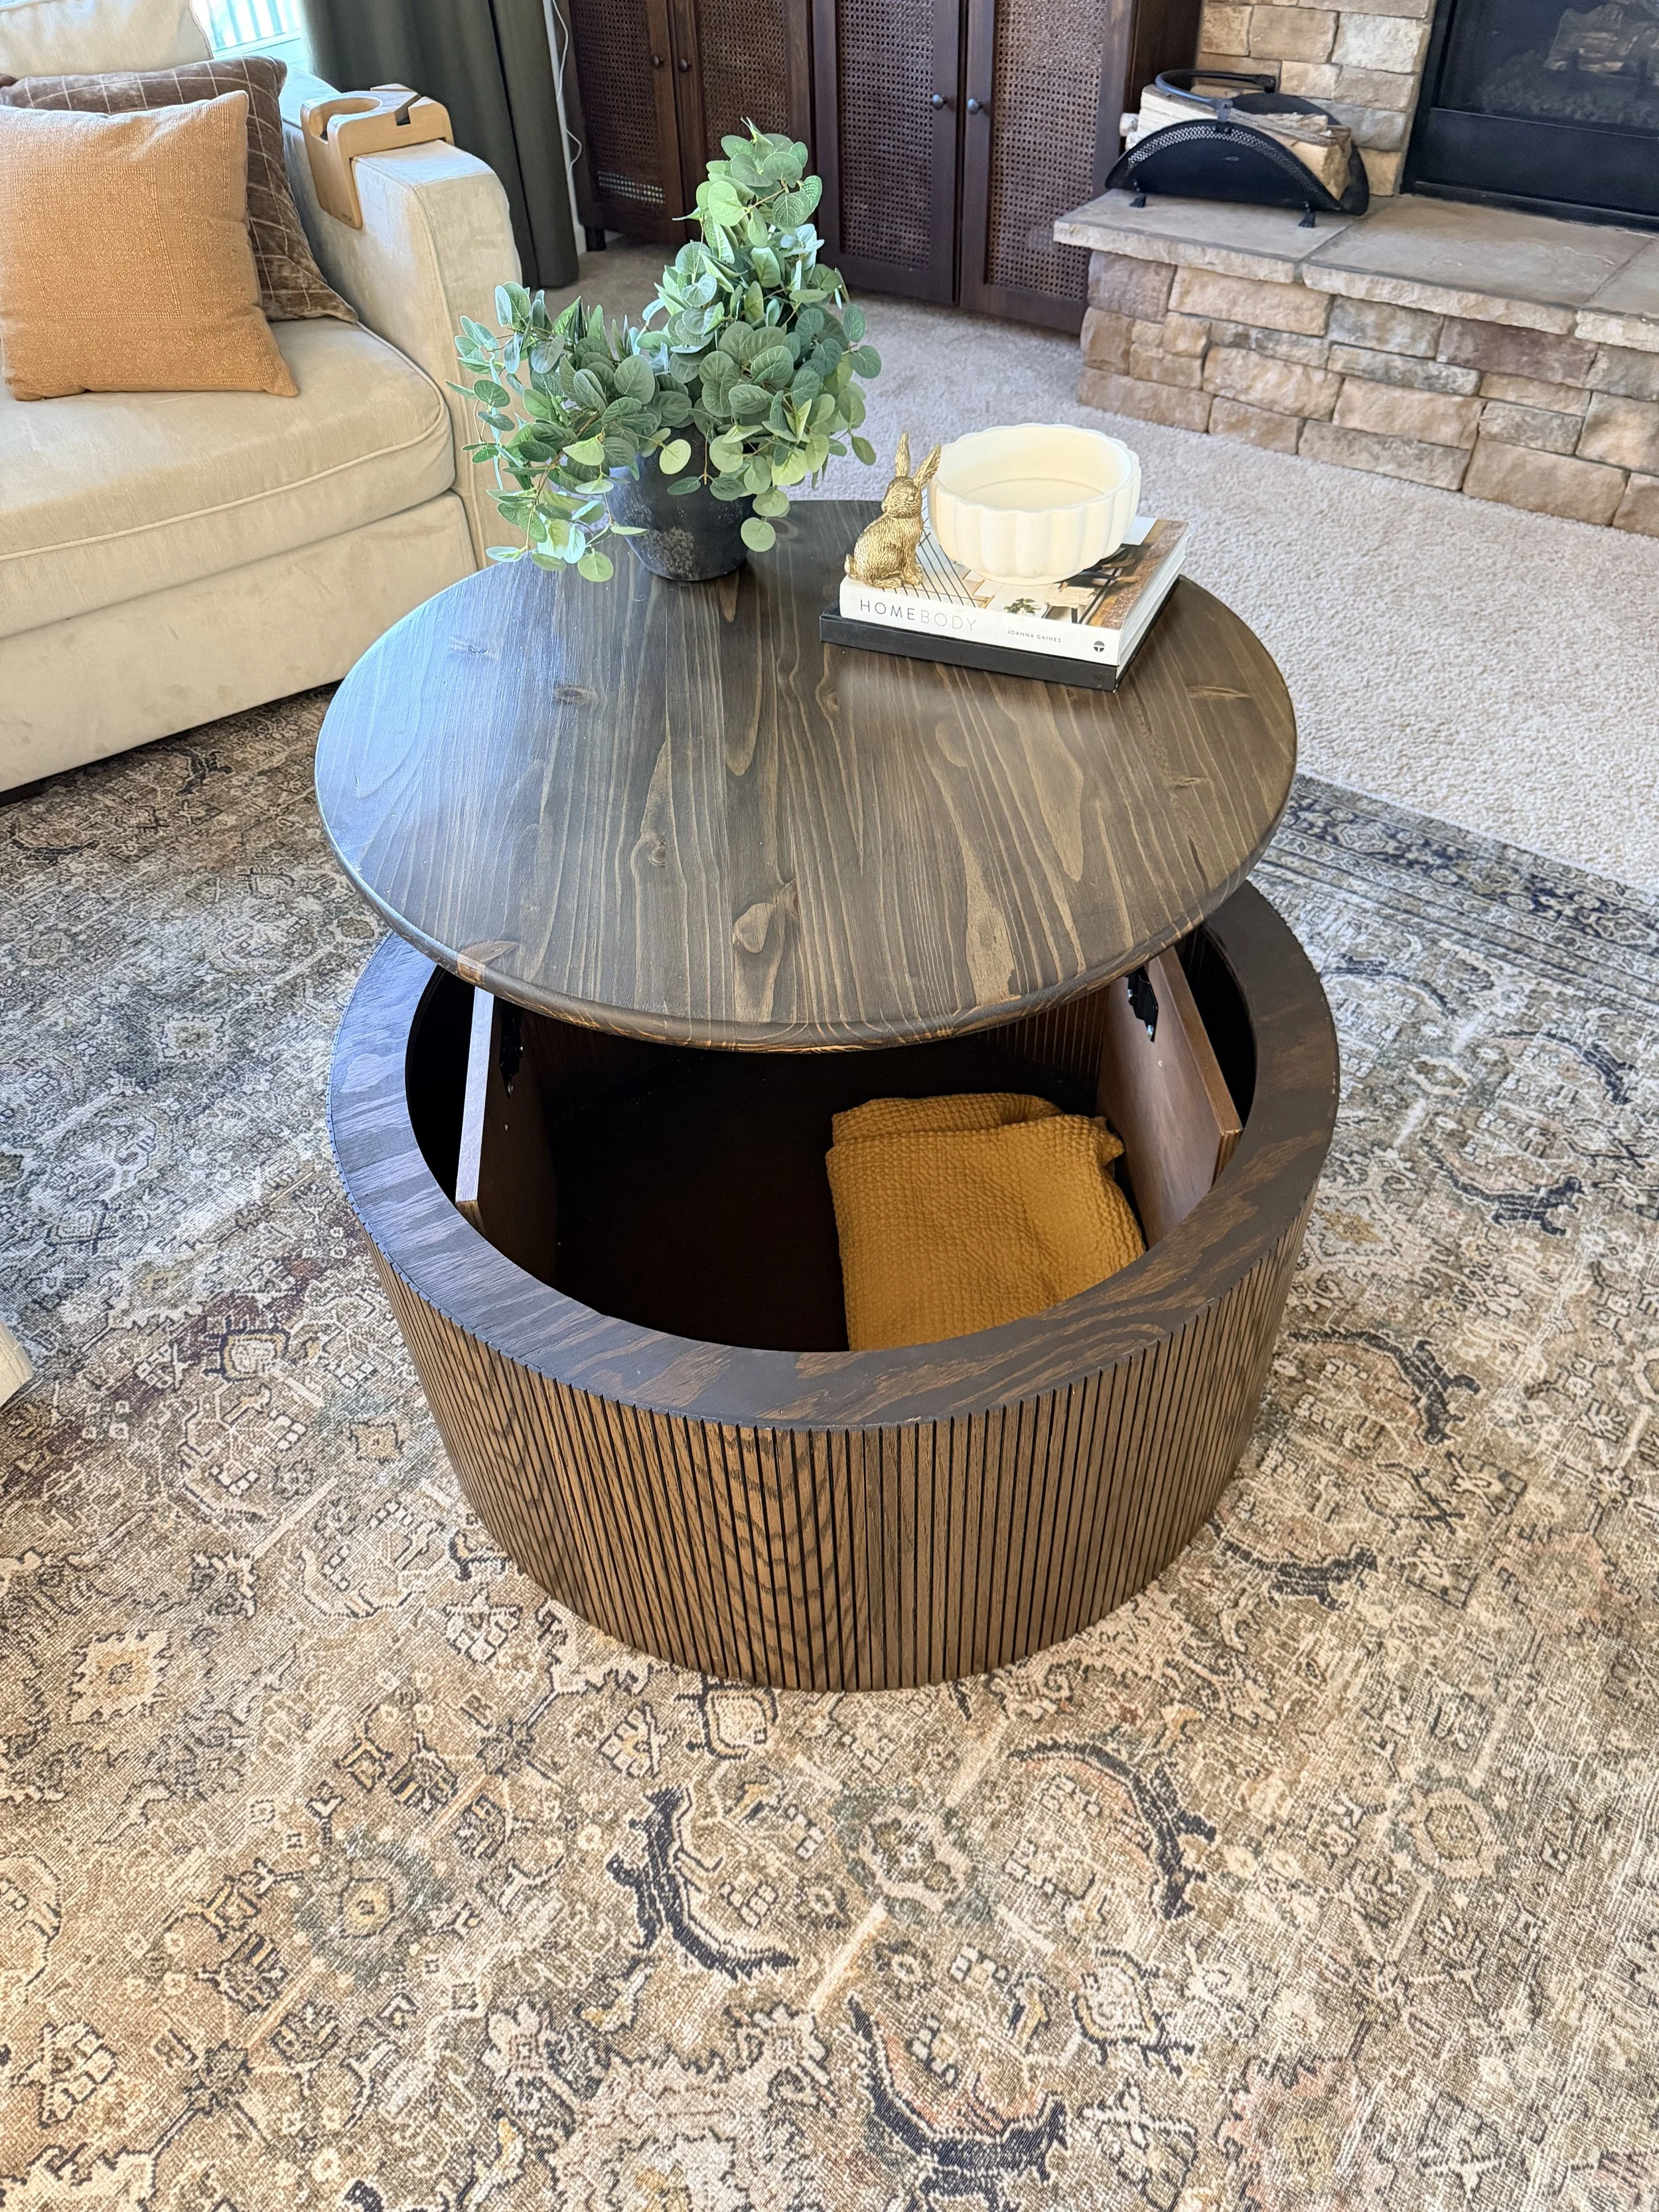
Step 7: Add Lift-Top Hardware
To make accessing the storage easier, I installed heavy-duty lift-top hinges.
First, I added 3/4" plywood blocks inside the table using pocket holes. This gave me a strong place to mount the hinges. Just make sure the piece of wood is tall enough to reach to the top of the coffee table. When you attach the lift hardware, it has to be come flush with the table so that it can connect to the lid of the coffee table.
Then I attached the lift hardware to both:
The interior supports
The tabletop lid

Tip: To make sure the hardware was flush with the top, I laid a scrap piece of wood across the opening where I was installing the lift hardware and adjusted it until the hardware sat right up against it.
To attach the lid, I set it on top of the new hardware and shut it. If you have another person to help you, this is where you ask them to come help! You then slowly open the lid, without moving it, and get under neath the lid and screw it to the top.
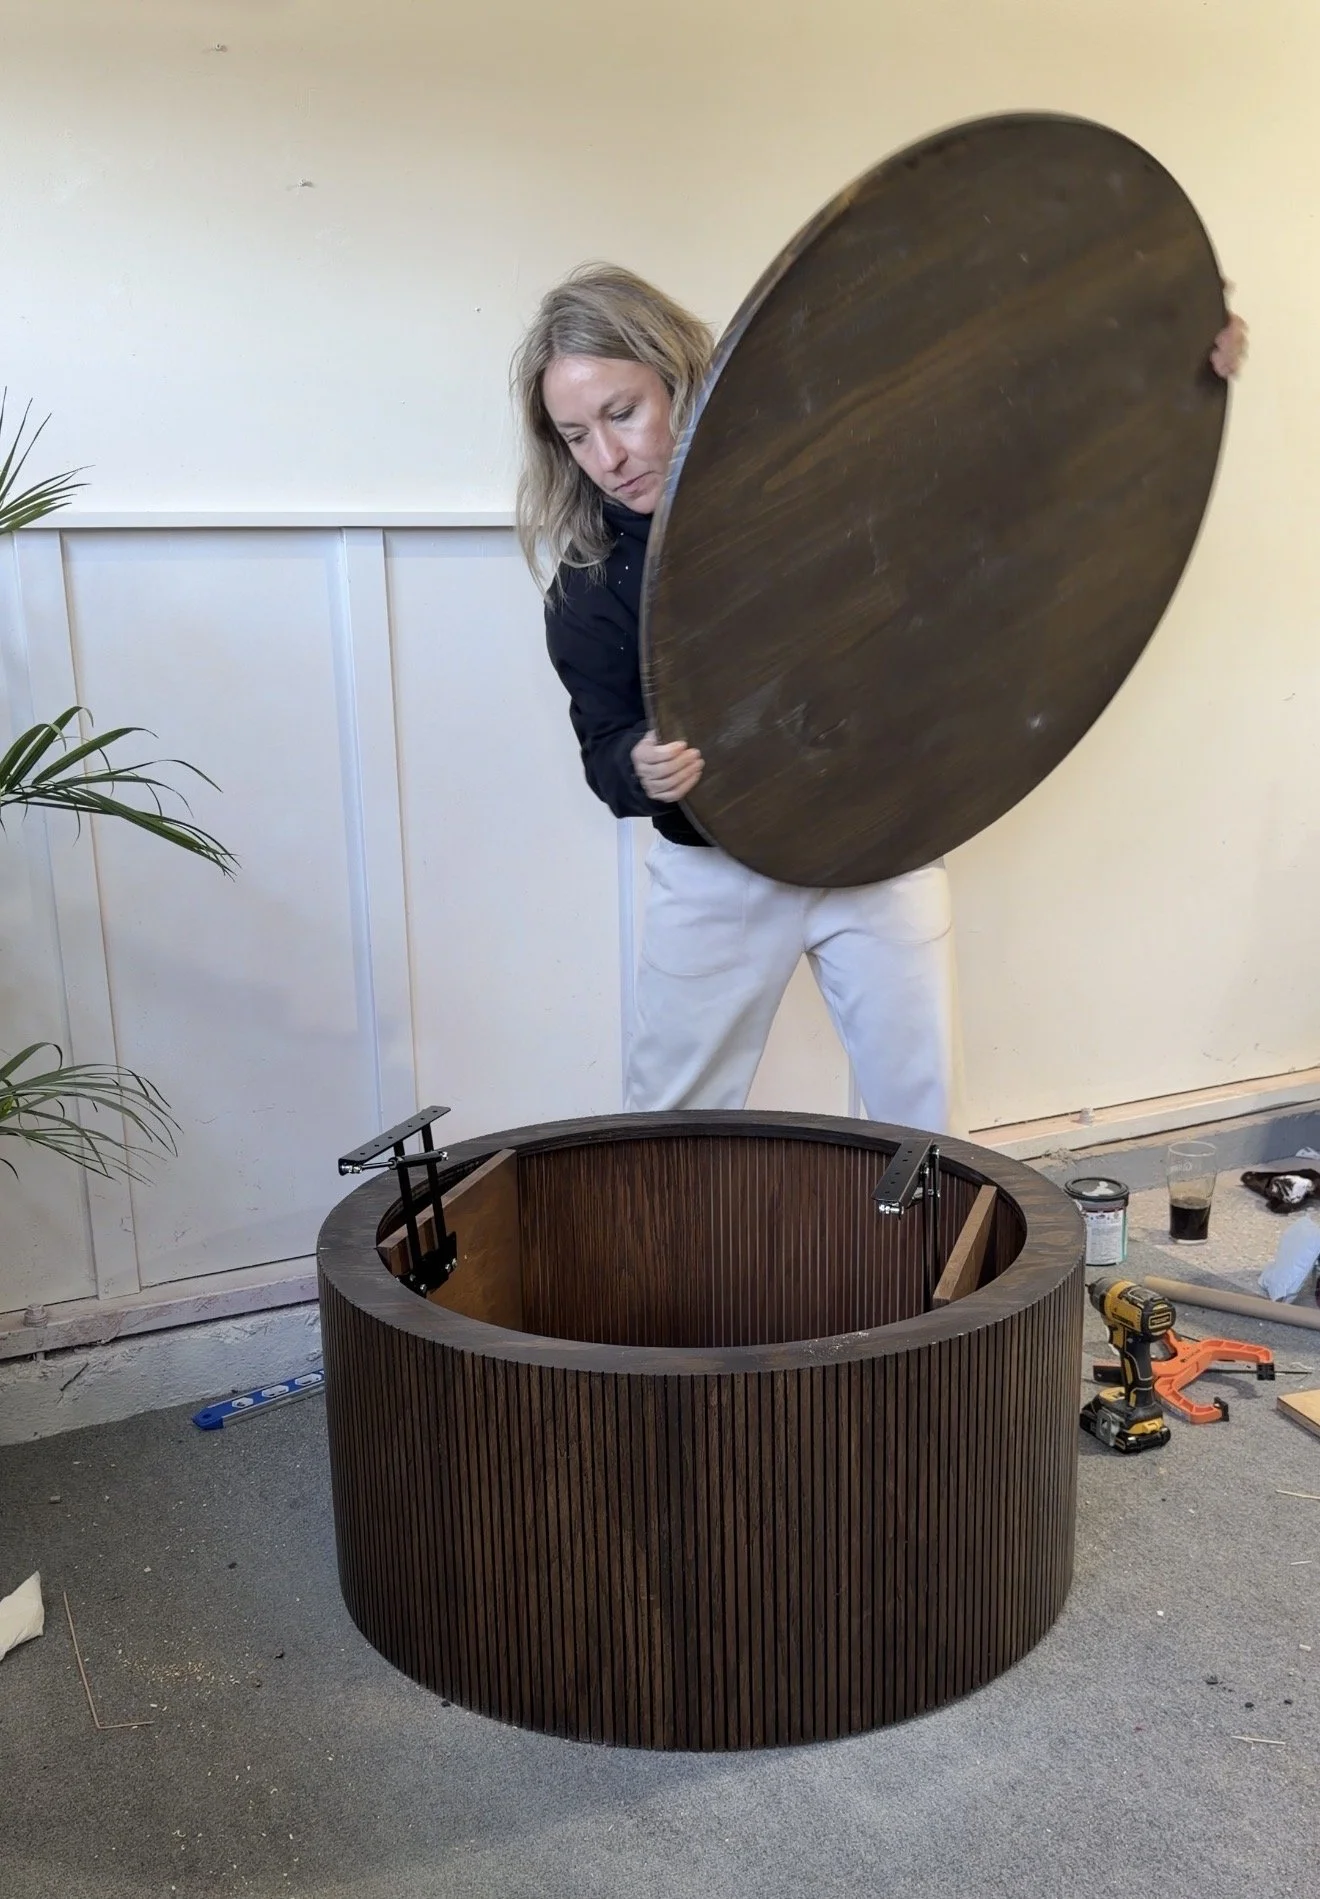
Now the lid lifts up smoothly, making it easy to grab blankets, games, or anything stored inside.
No more removing everything from the table first.
Final Result

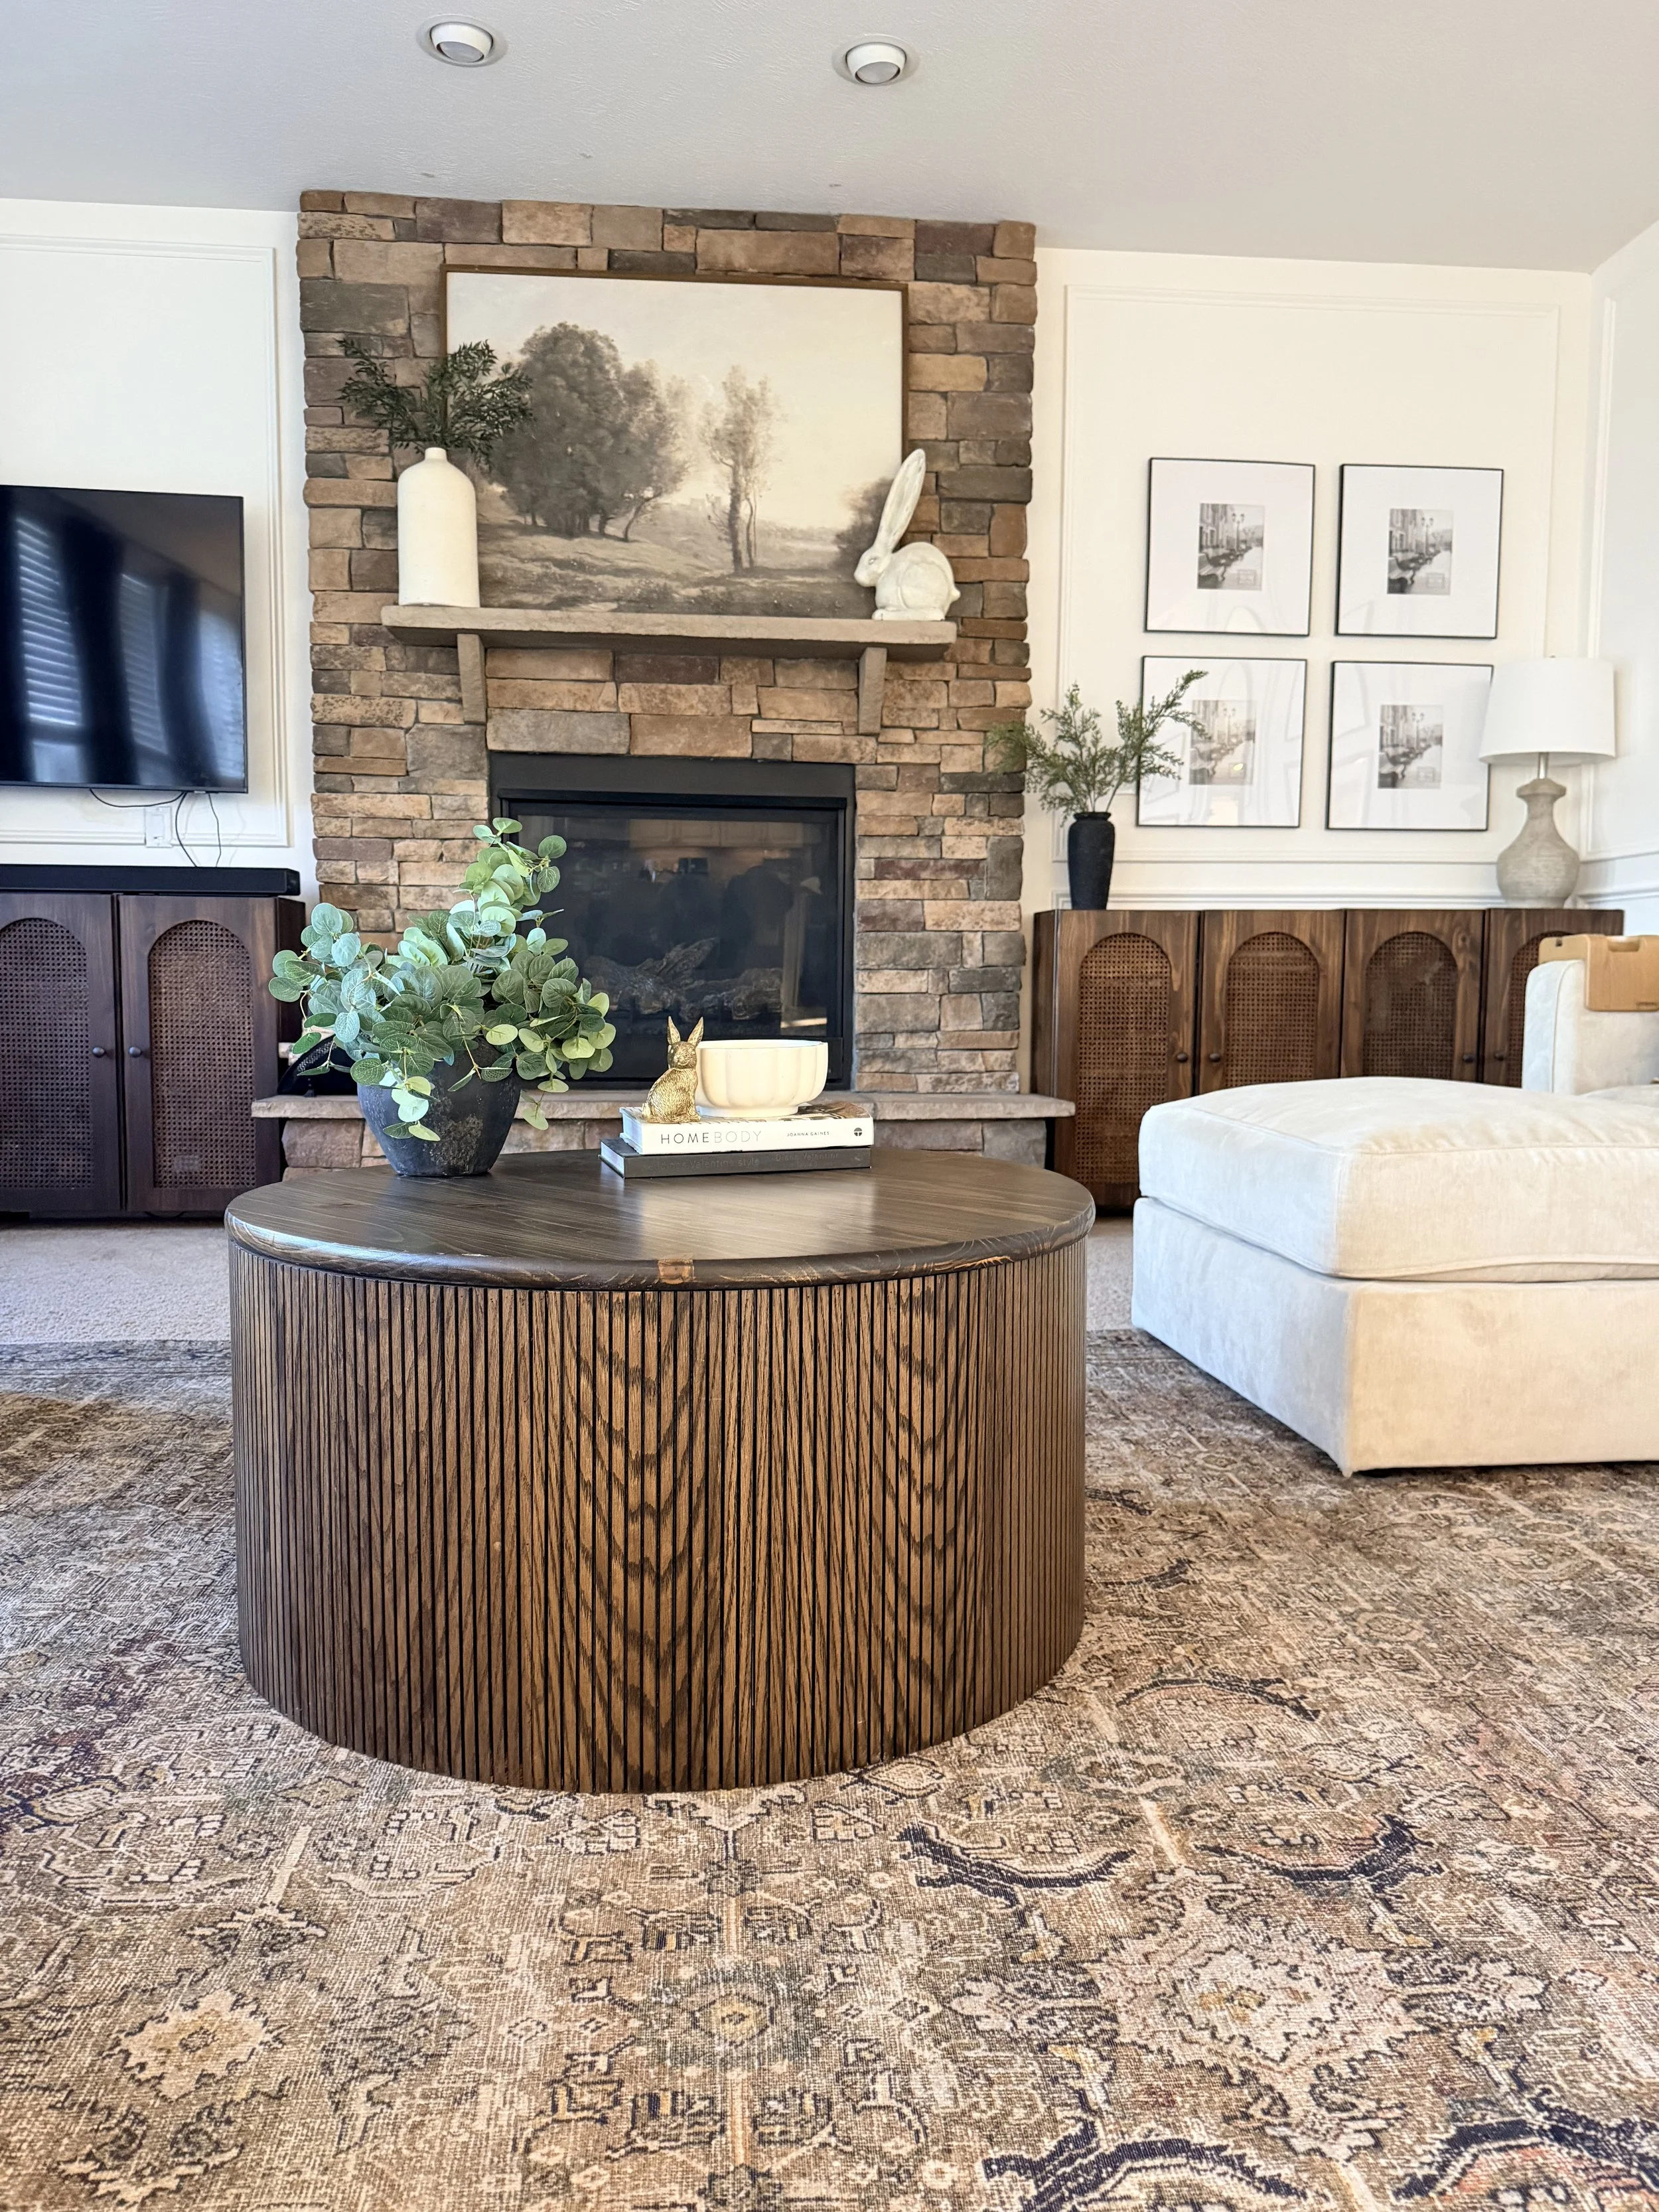
This DIY coffee table ended up being:
Modern
Functional
Designer looking
And full of hidden storage
The fluted pole wrap gives it a high-end look, while the lift-top lid makes the storage incredibly practical.
It’s honestly one of my favorite builds in our living room.
Shop the rest of my living room here → https://shopmy.us/shop/collections/4726835